Table of Contents
RealTime Audio in BEYOND
Introduction
BEYOND can record audio from a line-in or a microphone, and then do realtime audio processing. The raw audio waveform is saved in special buffer that can be used later within different parts of the software. The next step of processing is FFT. Raw audio waveform buffers contain 1024 samples, the FFT gives us 512 frequency bands. For each band, BEYOND has an automatic amplitude detector. The BEYOND software will save the data after FFT processing, and then the peak detector will generate Events (i.e. notifications of the peak on the frequency). In addition to this, the detector will also smooth the amplitude's fall, providing you with a very soft and subtle transitional motion (from the peak down to zero) until a new peak will set the value to high state again.
So what we have here is an audio wave (in an “as is” form), quick frequency analyzer with 512 bands, a peak detector for each frequency, and one more array of 512 “after smooth-filters”.

How to Display an Audio Wave
To display an audio wave form, use the Shape Editor. In most cases, the Shape will use a static figure as a base.
 Selecting this icon, will allow you to take data from the audio-in buffer and display it as is, in real time. This works very fast, and is very efficient. The number of points defines how many audio samples will be used. Size defines the amplitude of the waveform.
Audio Wave as an Oscillator
The second variation of the audio-scope theme, is to take the audio wave and use it’s waveform (instead of it’s sin, sawtooth, or other standard waveforms widely used within abstract frames).
You can take a standard figure as a starting shape, and then modulate that figure’s oscillation, by means of an audio wave.
Displaying the Frequency Analyzer
Just as with an audio wave, the Shape object offers embedded capability to display data from the spectrum analyzer (FFT). In this case, the Point number defines how many bands will be used. Size defines amplitude.
There are few predefined options for placement of the frequency bands. Dots, lines, grids, and rings. In all such cases, BEYOND generates special base shapes, and you can apply these to various effects.

Controlling Oscillators and Modulators
In the screenshot below, you can see the area where you can control oscillators and modulators as they relate to realtime audio processing within BEYOND.

Controlling the Oscillating Effects
Every oscillating effect is based on a simple conception. It goes from state A to state B during a specified period of time.

Controlling Color Effects
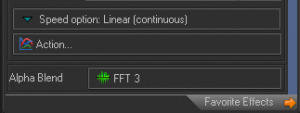
Audio can also control the blending of colors. Using the tool below, you can create a mix between the original color and a color after an effect occurs.
Controlling Key Effects
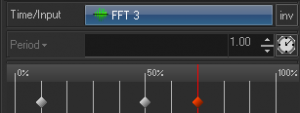
For key effects, Audio Input replaces time based action. Instead of having the motion based on time, the effect action will instead depend on the value of the input. The minimum value means that the effect is in a 0% position. The maximum value means that the effect is in a 100% position.
Channels, FFT and Time
If you were to take a sample audio wave form, it would most likely look like a compilation of random values put together. However, rather than doing this, you can instead achieve much better results using our frequency analyzer. The frequency takes it’s form from the music, and produces an “expected” pulsation. In the past, Pangolin software has supported Channels (an abstract socket, or interface, that connects the place that supplies data, and place that uses that data). This level of abstraction gave additional flexibility and many clients enjoyed the functionality. As such, we’ve included similar features within BEYOND. Lets take a closer look.
A source can be a DMX channel value, MIDI slider, or audio frequency amplitude. It is not critically important what the source exactly is. We also have the input value, which we take and present to other areas of the software as a Channel. The place that uses the channel has no idea what is behind it. It only knows the value, and knows how to use that value.
A good example of using Channels, is to consider a Wave Effect. The wave effect defines starting and finishing values, and in most cases, the motion between the start and finish is controlled by time. But instead of time we can also use a Channel value.
A low channel value means “start”, and a high channel value means “finish”. If behind the channel we have a DMX slider, then this slider will control the effect. If instead of a DMX slider we will used an FFT value, than the effect will act according to the audio input. We did it before in a direct manner, by means of the Input option. But using this new Channel feature, we can do so much more.
We know that the Channel hides what is behind it, and we also know that it allows you to make additional processing with the input value. One of the cool tools you can now use with this, is physics (a mass-spring filter). Another possibility is to mix the values using a ration… For example, currently BEYOND offers you the ability to mix DMX, FFT and manual values of a channel in the ratio. So, half of the motion may depend on the FFT and other half from DMX, or from manual input of the channel. The mix can be controlled in real time, from the Channel tab.
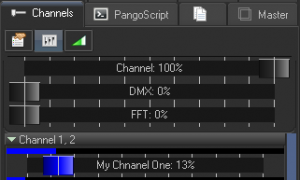
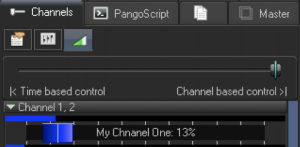
Another nice option, is the ability to mix together time and the channel. This may seem complex, but in reality it is actually quite easy to use and very powerful. Let’s say for instance that we have an effect that works by time. If we change the Input option to Channel, then it will follow the Channel. In certain settings, it may be very handy to have the ability to have one effect reacting from the Channel, and one from a time value. And in the same sense, we can mix together motion generated by time, and motion generated by the Channel. So as you can see, you have a lot of functionality to choose from here.
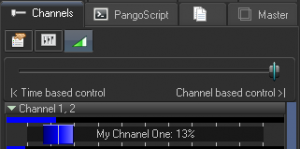
The slider shown below defines what your mix of time-based motion and Channel based motion is.
Audio Events
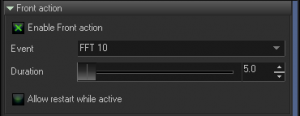
Up until now, we’ve been using audio frequency values for control. But, we had another idea when developing BEYOND, based on generating effects or triggering actions off of a “peak” in the audio frequency.
For example, the audio detector can be tuned for the detection of bass or for a drum beat, and it can detect those peaks within the frequency.
These peaks and events can then be used to execute a given action. The action is controlled by time. As such, all we need to trigger an action, is an event or peak.
We like to use a simple comparison to illustrate this point. If you use a frequency value to trigger an effect, than this effect will follow the amplitude, but it’s motion is not predictable. However, if we were to use the peaks in an audio event, then we have complete control over what happens, as well as how it happens. And the audio simply becomes the starting point of this process.
Event driven effects are an alternative solution to beat driven effects. The beat, or tempo, is a form of time, and all effects that use the beat are synchronized between each other. But we need to supply the beat. In the case of events, we do not need the beat. Audio activates the effect independently based off of the tempo.
Audio Events for Effects
BEYOND introduces a new feature, that has never before been seen within Pangolin software, and this is using Audio Events, for Effects.
As a rule, effects work as a function of time. Meaning that an application supplies the frame and time into an Effect, and the Effect does the transformation. It is like sin() or cos() in math. All are defined and expected, so we only need to supply an argument into the function to generate a result. This new feature of BEYOND allows you to keep control of time inside of an Effect.
So in this regard, an effect is a complete system that checks external events, and when corresponding events happen, then that effect starts its action. Such effects do not need external time, and really, such effects ignore external time - they use their own program.
Each BEYOND Effect item has it’s own settings that pertain to it’s reaction to audio events. This allows you to incorporate items that use audio, and items that use time, all into a single effect. If all items use audio events, then the effect may look static or inactive and this can cause confusion - so please take notice. But overall the design of the effect is entirely up to you, and you have complete control over how this is done.
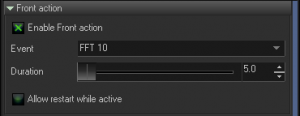
The first option we have here, is the “Time Accumulator”. This item works after a given period of time following an event, and then stops. There is also an option to reset the time accumulator after the event, if you wanted to do so.
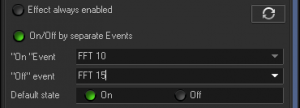
On/Off - Each Effect has it’s own internal “enabled” property. You can define events that will enable the effect, and and events that will disable them. It is also possible to use the same event or different ones.
On/Off sequence - This is a more complex option, that defines a sequence of enabled/disabled states. This is very helpful, when you are dealing with multiple items. For example, the first item will work on first event, second on second, and so on. Each effect may have a few items, but only some of them will be active when you use this tool.
Audio Events for Synth
Just as with Effect, Synth offers you an equal set of options to choose from. There are On/Off options for items, and On/Off sequences. The main idea with this is to turn images “on or off” that are part of Synth. In all other areas of BEYOND, the Synth supports effects with audio events. This allows you to combine Images and Effects that react on events in one place.
Events of Effect and Synth

BEYOND uses a string as an identifier of an event. Some names and identifiers are predefined in the system, for example “Audio”, “Manual”, “FFT 1”.
But you can create your own events with their own names as well. In this case you need to activate that event yourself, and it can be done using PangoScript:
For Example:
PulseEvent “My Event”
PulseEvent is a PangoScript command. It can activate scripts that wait for events, or Effect/Synth objects. Internally, BEYOND uses only one system of effects. So, you as the user define what events work just as with standard events.
The only difference, is that a standard event uses a standard name. All other events use your own names.
By the way, it is possible to use a PulseEvent with the name of a standard event. You may want to do this for testing purposes. It is also possible to use real audio input and wait for the “N” of the audio event. You can also make a reaction from a MIDI button that will call a PulseEvent command, to trigger your effects.
Events and PangoScripts
Example:

CodeName "AudioTest"
var counter
counter=0

start_pos:

WaitForAudioBeat 1
counter=counter+1
DisplayPopup counter
goto start_pos
Summary
BEYOND offers you a variety of ways to use real time audio data. The audio wave can be displayed by means of the Shape object. The Shape object offers a few styles for frequency analyzer visualization.
Audio waves, and frequency arrays can be used as waveforms for oscillators. Frequency can also control the parameters of oscillators. Frequency can also be used as one of the components of the Channel subsystem, that allows you to define hybrid reactions based on time and audio. The peaks of the frequency can generate Events and Events can trigger the items of Effect, Synth image, or PangoScript.