
Tools
Support
Pangolin Family of websites
Pangolin Laser Systems, Inc.
Kvant Lasers
Unity Lasers
ScannerMAX
Lasorb
Tools
Support
Pangolin Family of websites
Pangolin Laser Systems, Inc.
Kvant Lasers
Unity Lasers
ScannerMAX
Lasorb
The option “Selection” in the Line Types section of the Lasershow Converter 4D object tag allows to apply specific line and color settings only to selected faces or folds of an object. These selections appear with an own selection tag in the Cinema 4D object manager.
In contrast to the Edge Selection option, the Lasershow Converter 4D object tag will be assigned to a selection tag in the object manager. Edge Selection only works on specified edges of an object as a subdivision of these object, like contours, creases, or folds.
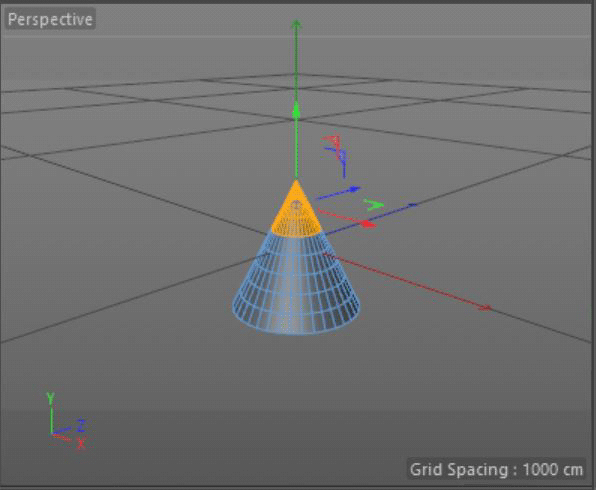
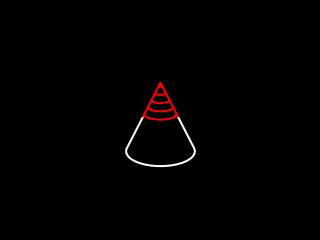
The picture below shows an example of a cone with a face selected top. The goal is to get totally different line type settings with the Lasershow Converter 4D for the cone top than for the rest of the cone. In this case, for the bottom, no specific line settings are done, so the Lasershow Converter will take the line sittings from the render plug-in. The settings for the top are taken from the LC4D object tag settings.
To select specific faces, you have to do the following:
 The make object editable button
 The face selection button

To demonstrate the differences of the settings, you may have a look to the following screen shots:

As you can see in the Lasershow Converter 4D object tag settings, the transparency, backfaces, and the prevent laser output option are disabled. For the selection we chose 10 contour lines in object y direction and a customized color. In contrast, the render settings dialog does not specify any contours or colors.
This example shows that the renderer takes the settings from the object tag for the selection and the render settings for the rest of the object.