QuickDMX
The QuickDMX tool allows you to quickly create DMX scenes or complete DMX sequences. Simply click on the QuickDMX tab at the bottom of the screen and you will see the QuickDMX tool. (Note that you will not see the QuickDMX feature until you have DMX Output enabled using the DMX Settings dialog box.)
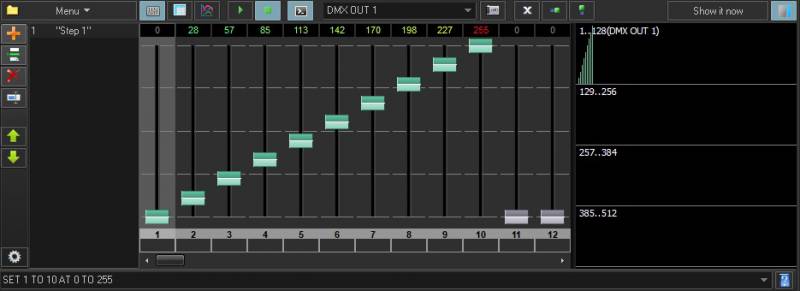
The main features of the QuickTargets tool are shown and described in the picture below.
As shown, you simply add as many steps as you want in the sequence, moving the sliders at each step, indicate the step duration, and then either Show it now, or drag and drop the sequence to a cue for playback later.
Adding steps to create a sequence
Although the QuickDMX tool can be used to output a single channel or channels continually (thus forming a DMX “scene” and requiring only a single Step), typically the QuickDMX tool is used to make sequences. To create a sequence, you must first add as many steps as you want in the sequence. For example, if you want to have a four-step sequence, simply click on the + button until you see four steps.
Controlling the speed of the sequence
The speed of the sequence is controlled by the Step duration control and by the Beats and Time buttons to the right of the Step duration control. Typically beam sequences are performed to the beat of the music and typically with each step within the sequence remaining on only for a single beat. If this is desired, see the picture above (which is also the default configuration). If you want each step to last two beats, you can increase the Step duration control to 2.0. If you want each step to last for 4 seconds, increase the Step duration control to 4 and click on the Time button (indicated by a Clock icon – this indicates time instead of beats).
Stepping through the sequence manually
You can review the output of each step by simply clicking the left mouse button on the desired Step. For example, if you want to see what the output looks like at Step 2, simply click on the word Step 2. The step number is made bold in the list.
Displaying the static or sequenced DMX momentarily
To send the output of the QuickDMX tool to the DMX output device, simply click on the Show it now button. If the Play button is pressed in the QuickDMX window, the DMX sequence will be output to the device. If the Stop button is pressed, only the selected step will be output.
Saving the QuickDMX to a cue
You can save the QuickDMX sequence to a cue for permanent storage or for use later. Simply drag and drop the preview window (or the QuickDMX tab itself) to a cue.
Changing the name of DMX channels
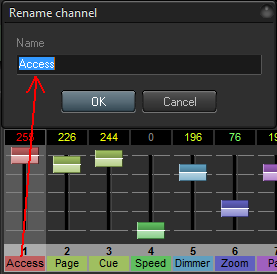
You can give each channel a different name by clicking the right mouse button on the label below the slider, and entering a name.
Changing the color and control type
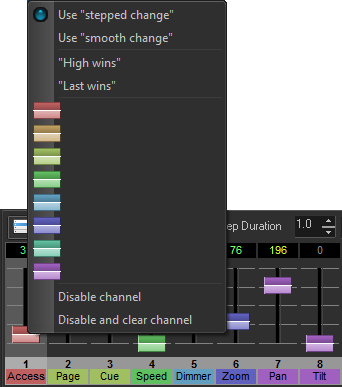
You can change the color of each slider by right-clicking on the slider itself, and then choosing a color in the menu. If you have a DMX fixture that uses six channels, you can make the six sliders that control that fixture all the same color, thus helping you to identify which sliders correspond to the fixture.
You can also designate a channel as requiring stepped change or smooth change. For example, certain lighting fixtures have control channels which require absolute values to be presented, while other channels that control the pan, tilt, and brightness would desire a smooth change. This too can be specified.
Changing how channels are viewed
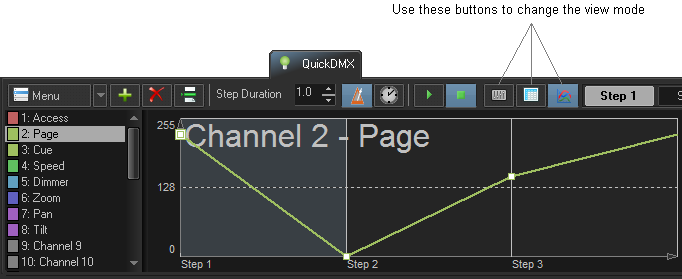
You can view the DMX either as sliders (as shown above), or as a spreadsheet format, or as a waveform, showing how the channel values will change at each step.
Utilizng the DMX Command Line Startin in BEYOND 5.5 you are now able to affect many channels at once utilizing a command line style command set. You can enable the Command line by pressing the button to the right of the “Stop” button. The command line will allow quicker utilization and setting of DMX values. The commands listed are below:
- SET - Used to select a DMX channel or channels.
- AT - Used to define a value of DMX.
- TO - Used to define a range, can be used for DMX Channels or DMX Values.
- ADD - Used to increase DMX values by number.
- SUB - Used to decrease DMX values by number.
Some Examples are:
- SET 1 AT 255 - Sets channel 1 at full.
- SET 1,2,3 AT 255 - Sets Channels 1,2,3 at full.
- SET 1 TO 100 at 125 - Sets Channels 1 through 100 at 125.
- SET 1 TO 100 at 0 TO 255 - Sets channels 1 through 100 increasingly from values of 0 to 255.
- SET 1 ADD 100 - Adds 100 points of value to the data.
- SET 1 SUB 100 - Subtracts 100 points value to the data.


