
Tools
Support
Pangolin Family of websites
Pangolin Laser Systems, Inc.
Kvant Lasers
Unity Lasers
ScannerMAX
Lasorb
Tools
Support
Pangolin Family of websites
Pangolin Laser Systems, Inc.
Kvant Lasers
Unity Lasers
ScannerMAX
Lasorb
Node Image is based on the same approach as “coding with blocks”.
The idea is that you can choose out of many preconfigured blocks, parts, modules, to make connections which will result in a visual code. These building block are typically called Nodes.
Node in BEYOND is a visual representation of objects.
In short, Node image is about placing nodes and connecting these by means of “wires”.
Conceptually, such model has several advantages such as
The disadvantages are
Overall, the Node Image is similar to a Synthesized Image. The Synthesized image is faster to process but the Node image offers much higher flexibility.
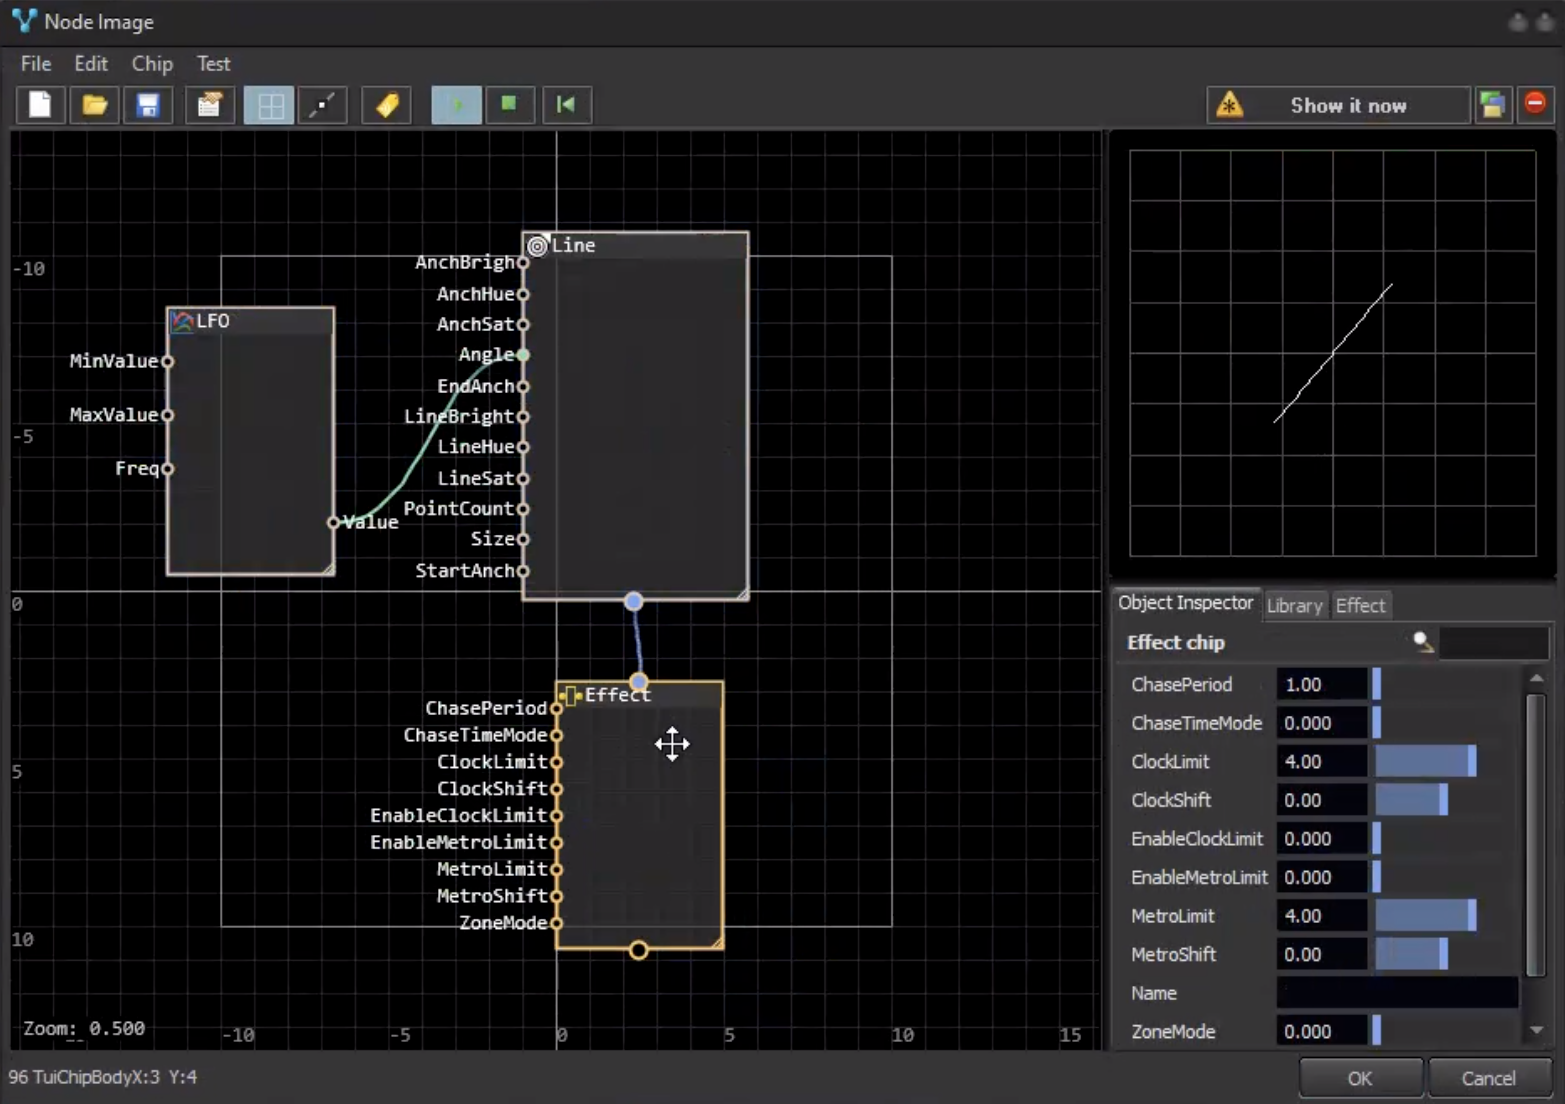
The node looks like a rectangle with input pins on the left side, and output pins on the right.
Each Node has Object behind it. You may use any exiting Object of BEYOND as a node. The context menu of Node allows you to define visible pins (object properties which visually represented as a pins). The input pin may be connected to only one output pin. The output pin may be connected to multiple input pins.
Typically, object properties are available for reading as well as for writing. However, there are some exceptions
There are two special types of nodes.
The image node is designed to store standard BEYOND images such as Shape, Abstract, Parametric Image, etc.
The Image node has a special pin at the bottom. This pin is the frame output pin.
Such pins could be connected to an effect node. If the Image node is not connected to an effect node, then the frame directly goes to output, without any modification by an effect.
The effect node stores the effect inside. Such nodes have an input pin on top and an output pin on the bottom side of rectangle. You may connect the input pin of an effect to the output pin of an Image node, or to a complete other effect node.
The output pin can be connected to other effect nodes. If this pin is not connected, this would mean that this whould be the final calculation of the effect, and this is how the frame will displayed.
Nodes should be places from left to right. Input pins are on the left side, output pins are on the right side. The Image should be placed above. Effects located below, which forms a top to bottom direction.
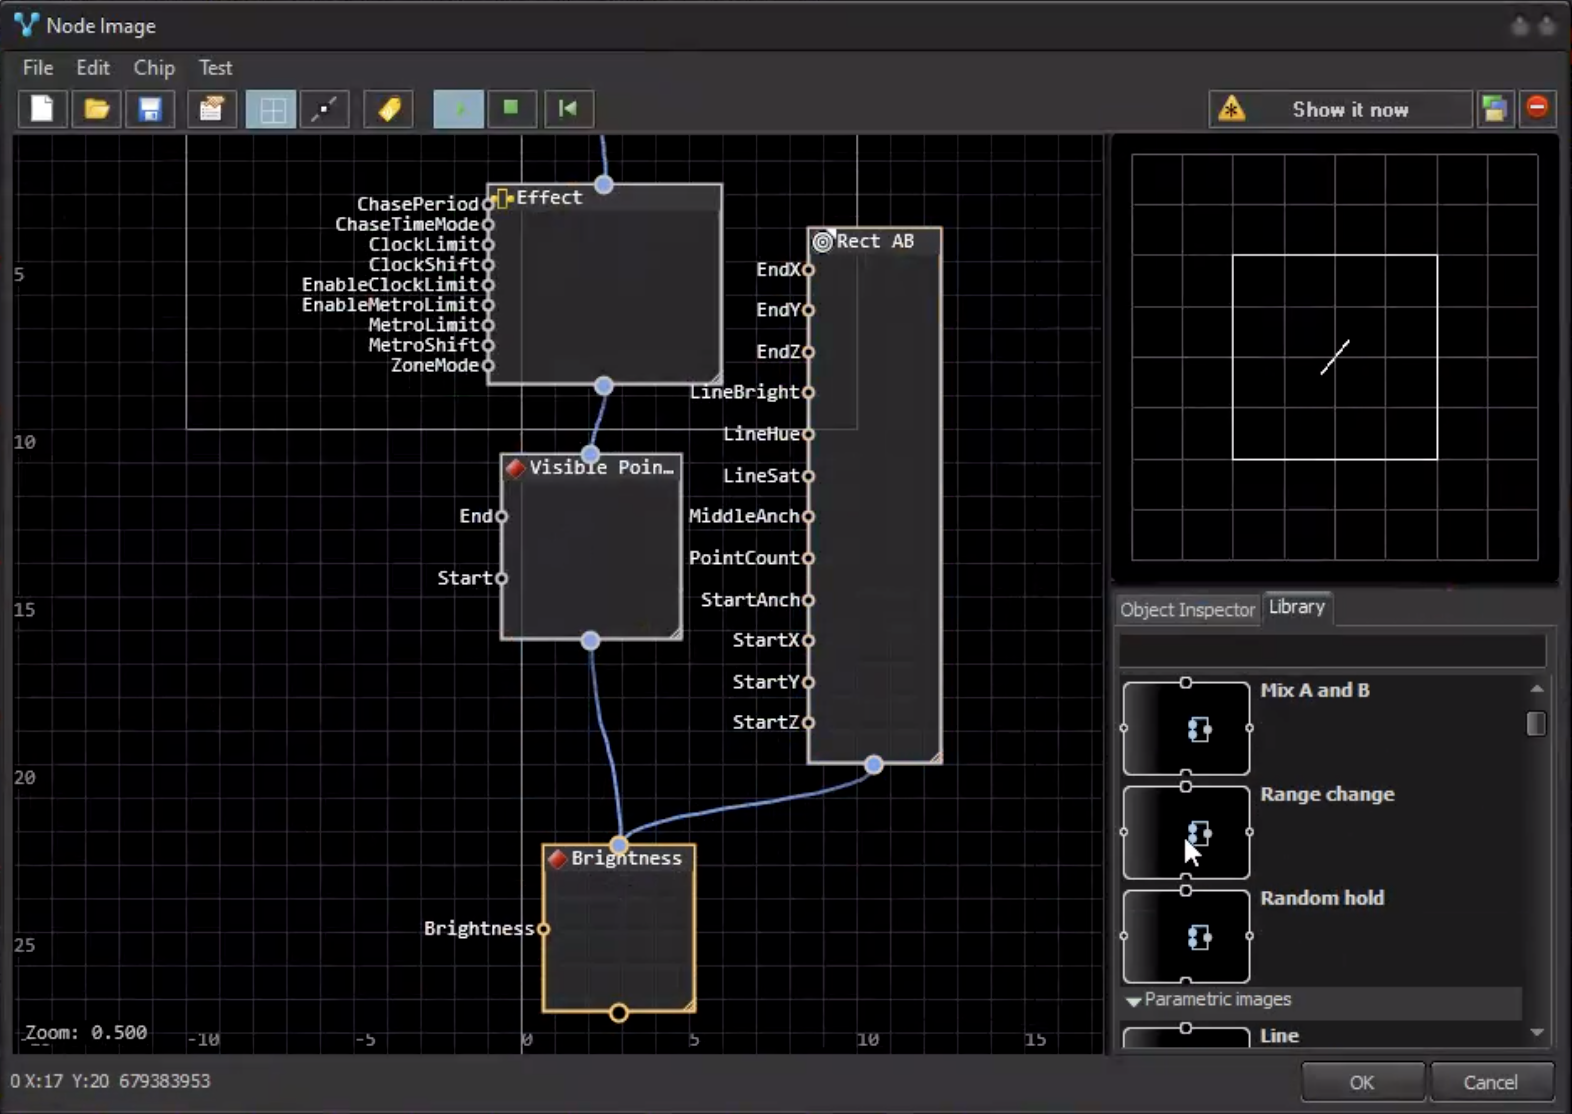
Image nodes: Images nodes may keep standard Images. The Parametric image is a great companion. This image type initially designed for being controlled externally. It can do for you lines, circles and other shapes based on specified parameters. BEYOND offers over 40 types of Parametric images.
Effect nodes: There are two types of effect nodes.
There is a Node which keeps the classic BEYOND effect storred inside and the second version is based on Key effects.
A standard key effect is a sequence of key states. Inside of the Node you can use a key effect, where all key effect setting are available as input pins. You can control these pins separately. BEYOND offers over 150+ types of key effects.
Input nodes: This group of nodes allows you to use input from Audio, MIDI, DMX, Channels, etc.
MOBOLASER. The mobile application allows you to use the mobile its device sensors as input for creation of interactive applications.
Base logic: These contain LFO, nodes for multiplication, sum, range change, etc. Overall, this is a collection of simple math operations to modify the values.
To add a node, drag and drop an object from Library tab to main design panel.
The final element here – ability to use any object from Object Tree as a node. To add such node – use context menu of main design panel. Please be aware – this is an external connection. There is no guarantee that object will exist on other BEYOND. Of course, this is not related to standard object such as Master, or similar.
The object inspector provides general access to object properties. Click on a node object and you will see all of its properties in the lower right corner.
Fifo image is a signal recorder. You can drive Cursor position from external sources, LFO, etc
Parametric Images are node friendly. Shape image is a similar object, however its less controllable than a parametric image.