Tools
Support
Pangolin Family of websites
Pangolin Laser Systems, Inc.
Kvant Lasers
Unity Lasers
ScannerMAX
Lasorb
Tools
Support
Pangolin Family of websites
Pangolin Laser Systems, Inc.
Kvant Lasers
Unity Lasers
ScannerMAX
Lasorb
When you start Cinema 4D, the initial screen looks something like this:
Let's create a simple cube and then render it to laser using Lasershow Converter 4D.
The result may look like this:
Due to its special render pipeline, Cinema 4D handles the Lasershow Converter 4D as a post-render effect. Once Lasershow Converter 4D is selected as a post render effect, every scene or frame can be rendered for the laser output.
Assigning the Render Plug-In:
1. Open the Render Settings Menu, either by clicking on the render settings button or the <CTRL+B> shortcut.

2. In the appearing dialog box, click on the Effect button, and choose LC4D.
3. Add the Lasershow Converter 4D (LC4D) to the Effects menu.
Now the default settings of the Lasershow Converter appear. The Lasershow Converter effect is subdivided into five sections for specific settings. These are Default line types, Default line color, Default filter settings, Laser Output and LC4D Help. These sections are explained more detailed in the Post-Render Effect chapter.
Please note that changes on these settings are affecting all objects in the scene. For applying adjustments on selected objects, the Object Tag offers more detailed possibilities.
Now that Lasershow Converter 4D has been applied as the post-render effect, you can begin rendering this scene. To do this, open the Render Settings dialog by clicking on the Render Settings button or using the <CTRL+B> shortcut.
 | The render settings button |
In the Output section, you can apply following settings:
In addition, we recommend that in the Output section, you enter 320 for width and 320 for height. These numbers control two things:
Note: Lasershow Converter 4D does filtering calculations, corner detection calculations and curve detection calculations based on the Output Size settings. The default values for the filter, curve and corner settings are based on a frame window output size of 320-by-320 or 320-by-240. If you choose a different output size (such as 640-by-480), this may require you to change Lasershow Converter 4D's filter, corner and curve settings.
As an additional benefit, when the frame window output size is set to 320-by-320 or 320-by-240, each pixel works out to be around one laser beam diameter. For additional information on this benefit, see the Object filter settings topic.
Now that a few default1) settings have been set, normal operation can begin. Here is the Lasershow Converter 4D control screen. You will see a number of options that will be discussed in more detail later. For most scenes, these default options will be fine.
To see the rendered results, simply click the Render button (or use the <CTRL+R> shortcut) to see the resulting cube outline.
 | The render button] |
The result can be seen below:
In the last step, we rendered a single frame of the cube. Let's create an animation of the cube moving. To do this, we use the Auto-Keyframing function of Cinema 4D:
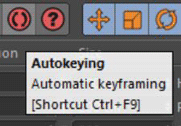
1. Press the Auto-Keyframing button below the perspective view.

2. Move the Time Slider all the way to the right, to frame 100.
3. Move the box with the moving tool. Ensure that the box is selected.

At this point, you should be able to move the Time Slider back and forth, and see the box moving.
Note: The Auto-Keyframe function automatically inserts keyframes on the timeline position where changes on objects are applied. Please ensure that this function is deactivated unless you want to add changes in your scene.
To create a laser animation of the moving cube, click on the Render Settings button (or use the <CTRL+B> shortcut) to open the render settings dialog.
The last time, only one frame of the cube was rendered. This is because Current Frame was selected in the Frame pull-down selection. In this case, we want to create the full 100-frame animation, so select All Frames: 0 to 100. Once this has been done, press the Render button. You will see each frame in the 100-frame animation as it is rendered.
In Cinema 4D, when you click Render there is an annoying dialog box with an incorrect “warning” message. If you don't have a file name selected with the Save File check box checked, AND if you are rendering more than one frame, you get a box saying “Frames may be lost”. This message is wrong – no frames will be lost.
Simply click “Yes” to render the scene anyway.

The rendered animation can now be viewed either in the Preview Window or on a laser projector, if connected.
To see a single frame or the complete animation in laser light, the Laser Output has to be activated. This is done in the Effects section of the Render Settings dialog of Cinema 4D:
Select the Laser Output section and press the Open Preview Window button. When the Laser Preview window is open, Laser Output will be activated and the Frame Slider in Cinema 4D will act like the Frame Slider in BEYOND. Note that the laser output seen on the laser and in the preview window will only correspond to the Cinema 4D scene if the respective frames have already been rendered.
Note: Ensure that the Enable Post Effects checkbox on the top is activated.
Now simply click the Play button in Cinema 4D. You will see the scene played in the Cinema 4D viewports and also in the Lasershow Converter 4D preview window.
Here is a summary of how to create laser frames and animations with Lasershow Converter 4D: