
Tools
Support
Pangolin Family of websites
Pangolin Laser Systems, Inc.
Kvant Lasers
Unity Lasers
ScannerMAX
Lasorb
Tools
Support
Pangolin Family of websites
Pangolin Laser Systems, Inc.
Kvant Lasers
Unity Lasers
ScannerMAX
Lasorb
Before starting with the series of tutorials I first want to show the basics and features of BEYOND 3D’s interface then I would like to show how to create scenes with just basic objects and give an introduction to each new chapter.
The reason why we first introduce you to the interface is, because it makes it easier for you to find functions. Reading it isn’t required but it is useful ( I do advice it).
Do use the interface chapter as an reference for the tutorials. The interface introduction is to prevent confusion and disorientation during the tutorials it also prevents me from constantly having to explain where things can be found in the BEYOND 3D interface.
Should any difficulty or confusion occur during the use of BEYOND 3D, even with this guide: Please contact Pangolin directly.
To make it more clear about what part of the interface I’m talking about, I have defined a name to each part of the BEYOND 3D interface as seen in the image below.
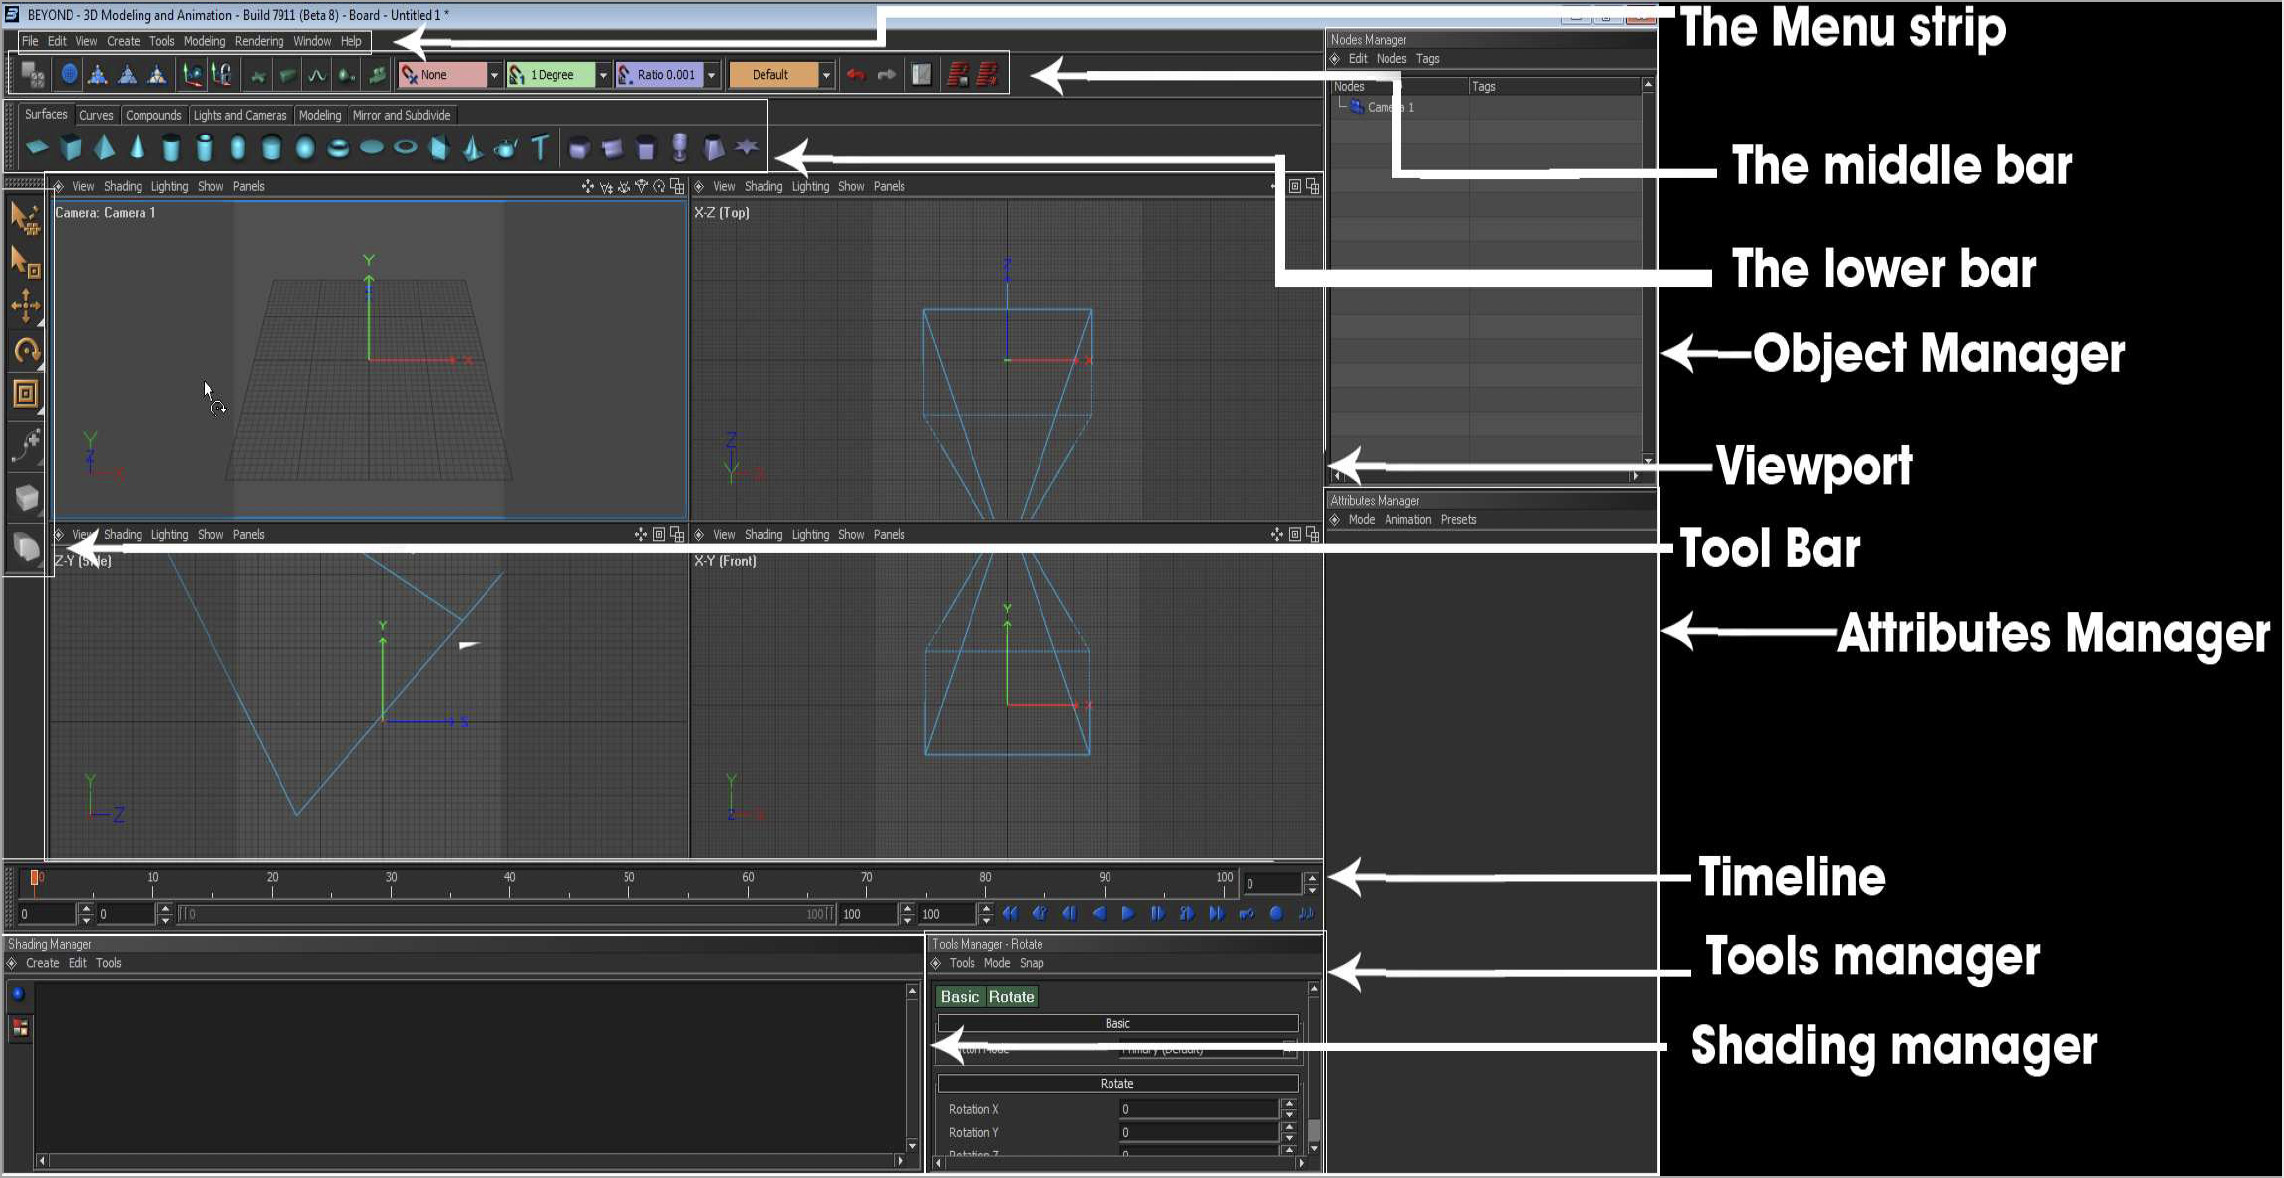
We start from the top of BEYOND 3D’s interface and work ourselves to the bottom of it first. Use this chapter as reference whenever you get disoriented.

| Menu | Function |
|---|---|
| File | Load and save 3D Scene files and import FBX files (3D format to support other platforms). Make good use of the FBX import when you don’t prefer modeling/animating in BEYOND 3D, make sure you don’t export lines/splines or bones from your 3D program, otherwise lines will be come double and bones aren’t yet supported by BEYOND 3D (resulting in no animation for that). |
| Edit | Mostly found on the rest of BEYONDs interface. |
| View | This allows you to enable and disable toolbars. As with the Edit menu, I do not use this very much. When you want to change your view that would be done in the viewport or just by selecting a different view (more on this later). |
| Create | This allows you to switch between two creation modes, and it also duplicates toolbar buttons. Auto Create - As soon as you click one of the standard objects *found on the surfaces tab* it will directly create an object in the middle. This works like Cinema 4D. Interactive Create - If you ever used 3ds max then you find this mode similar, an object wont be created once you click it, instead you have to click inside the viewport and drag to create an object. |
| Tools | Quick access to tools found on the lower bar and on the tool bar |
| Modeling | Quick access to all the functions found in the modeling tab on the lower bar. |
| Rendering | Render button and render options (can also be found on the lower bar) |
| Window | This allows you to select all the layouts. BEYOND 3D allows you to have multiple files open at the same time. This also allows you to change between Standard, Modeling, Animation and Rendering layouts. |
| About | About BEYOND 3D, help and contact information |

| Tool | Function |
|---|---|
| | Convert to editable - Converting a standard object to an editable mesh, meaning you can move vertexes *points of an object* |
| | Objects mode - This one is on by default, when this is selected you move the complete object, on only this mode you can move and rotate complete objects. |
| | Points mode - This allows you to move the vertexes of an mesh. Note that this is only available when an object is an editable mesh. |
| | Edges mode - This allows you to move the edges of an mesh. Note that this is only available when an object is an editable mesh. |
| | Faces mode - This allows you to move the faces of an mesh, the faces of an mesh would be the solid surfaces of an mesh. Note that this is only available when an object is an editable mesh. |
| | World coordinates - This allows you to specify whether you are working in local coordinates or world coordinates |
| | Lock Pivot - The lock pivot feature allows you to lock a pivot in place even when you move an object, the pivot will be locked on the same spot despite selecting an other object. |
| | Allow Handles Selection - Allows you to select handles in the viewport. |
| | Allow Surfaces Selection - Allows you to select object (meshes) in the viewport. |
| | Allow Curves Selection - Allows you to select curves, lines in the viewport. |
| | Allow Lights Selection - Allows you to select lights in the viewport. |
| | Allow Cameras Selection - Allows you to select cameras in the viewport. |
| Tool | Function |
|---|---|
 | Position Snapping - Allows you to have objects snap in to one of the 3 specified grids when moved |
 | Rotation Snapping - Allows you to fine tune the amount of steps a rotation moves when you move your cursor (in steps of 5 degrees, etc) |
 | Scale Snapping - Allows you to change the sensivity of the scale tool. |
 | Layout - Allows you to change the layout of Beyond 3D by choosing one of the presets. |
| Tool | Function |
|---|---|
| | Undo - Undo an action |
| | Redo - Redo an action that was previously undo *by clicking the undo button* |
| | Animation Editor - Opens up the Animation editor. - In the animation editor you can modify various things as for example animation interpolation. Note that the Animation Editor also appears in Animation modeling layout view, and that the Animation Editor can be docked or removed and placed anywhere. |
| | Render Setup - Allows you to adjust the render settings. |
| | Render - Renders the scene. (This must be done before saving laser frames.) |

Most of the lower bar will be discussed in the modeling Tutorials. The lower bar has 6 tabs
| Menu name | Function |
|---|---|
| Surfaces | Here you create the standard objects, from these objects you should start modeling. |
| Curves | Create lines and curves |
| Compounds | Handles to attach or control objects with, Merge and combine or subtract objects, create morph objects, arrays, symmetry and instance surfaces. |
| Lights and Cameras | Add camera’s or lights. |
| Modeling | Modeling features and shading groups |
| Mirror and Subdivide | Subdivide objects or mirror them, Subdividing an object smooths an object (please note to tick “hide subdivision source” to see the smoothing changes) |
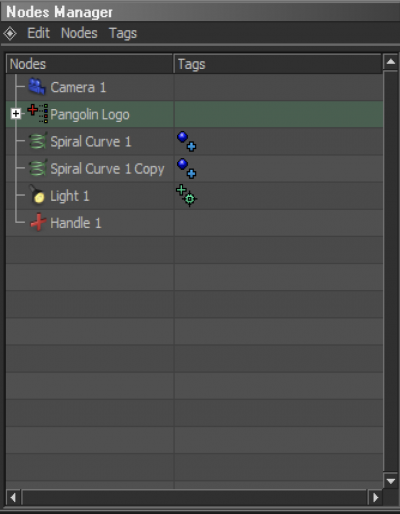
The Objects Manager (formerly called the Nodes Manager) is where all your: objects, lights handles,spirals, curves, camera’s, etc. will appear. The Objects manager allows you to quickly select objects without having to select them in the viewport.
You can also see if an object is attached to an handle or is textured or not. (by looking at the icons behind under the Modifiers heading, which is formerly called tags.) Note that all icons and their meanings can be found under the Objects Manager image.
The Objects Manager allows you to create groups by clicking the manger and pressing: “N”, or by right-clicking in the list. Groups are perfect for moving multiple objects on a single pivot, or to move the pivot to make hinges for doors, make robots, etc. To do this we will make an object, make a group and then drag the object inside the group. Once it’s in the group you offset the object *by clicking the object and not the group* Offset the position from the center and then move select the group and you will notice this will act as its pivot now.
| Tool | Function |
|---|---|
| | A shader/texture has been assigned to this object. |
| | This object is connected to a node/handle. |
This is where you model and animate from, most of the time you will be looking and working in this.

The viewports can be sized by moving the sides of the viewport. Example:

There’s also the option to change what you see in the viewport

If you go in view you have the ability to select an diferent perspective, or look from a different camera.
If you click on the Shading menu, you can select enable realtime laser output or laser over black or laser over grid, Laser over black and laser over grid , these 2 act as a kind of preview screen. The laser over black can be seen in the front viewport in the pangolin logo picture above this text.
If you have light shading enabled in the render settings and want to see shading of the camera’s you addeed in the scene you need to Go to lighting and change “use default”to “use all”
The tool bar will be your main used bar for manipulation of objects. We’ll explain the tool and feature starting from the top.
| Tool | Function |
|---|---|
| | Create - Same as enabling “interactive create” in the Create Menu Strip. Allows you to drag out objects in the viewport instead of them being automatically created in the center. |
| | Select - Allows you to select one or multiple objects (by dragging). (if you’re not dragging but clicking and want to select multiple objects, hold down the Control key to do so. |
| | Move - Allows you to move: objects, vertexes and most nearly about everything in the X, Y and Z axis. By clicking the inside of the move tool you can move the object freely around, by clicking one of the tools lines you will keep locked on only moving that axis. |
| | Rotate - Rotate an object up, down, left or right By clicking the inside of the rotate tool you can rotate the object freely around, by clicking one of the tools lines you will keep locked on only rotating that axis. |
| | Scale - Use to scale in either the X,Y,Z Axis. By clicking the inside of the scale tool you can scale the object freely around, by clicking one of the tools lines you will keep locked on only scaling that axis. |
| | Curves – Add point - Add points in a curve *in between a curve*, click on the curve where you want to add a point. This feature is only enabled when working with a curve |
| | Surfaces – Extrude - *faces mode can be found in the middle bar* Extrude a face. This feature is only enabled when working in faces mode |
| | Surfaces – Bend - *faces mode can be found in the middle bar* Bends a selected surface, to start bending you select the object *not the visible tool In the viewport and drag away from the face while holding your left-mouse button. This feature is only enabled when working in faces mode |
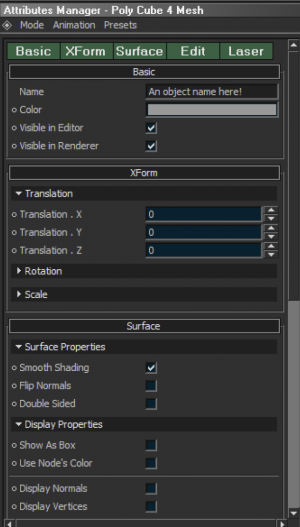
The Attributes Manager is differs in settings from each object you select. When possible the Attributes Manager is where you are able to set laser options for each individual object, and also allows you to specify an amount of segments to an object if the object isn’t converted to an edible mesh yet.
You can also set Settings for textures here, textures and more. Please note that you can scroll in the Attributes Manager too by holding the middle mouse button in the Attributes Manager and moving either up or down.

| Tool | Function |
|---|---|
| | Go back to the first frame. |
| | Go back to the previous key-frame. |
| | Go back a single frame. |
| | Play backwards/stop. |
| | Play Forward/Stop. |
| | Go forward a single frame. |
| | Go forward to the next key-frame. |
| | Go forward to the last frame. |
| | Enable/Disable auto keying - Auto keying will place key-frames automatically when you rotate, move or manipulate an object. Without requiring you to press the Record button. |
| | Register key-frame. |
| | Load audio file. |
In the Timeline you can drag key-frames with your mouse when clicking and holding. This can be useful to adjusting and fine-tuning certain animation that they will be well in sync with either your music or just have the proper speed you’d like.
To extend the timeline *for a longer animation then 100 frames* you need to adjust the end frame text box.
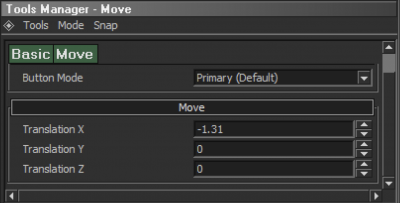
The tools manager is one of the fewest used sections of BEYOND 3D.
Other then the the posibility of moving an object by changing value’s there isn’t much to talk about. (This can also be done in the Attributes Manager).
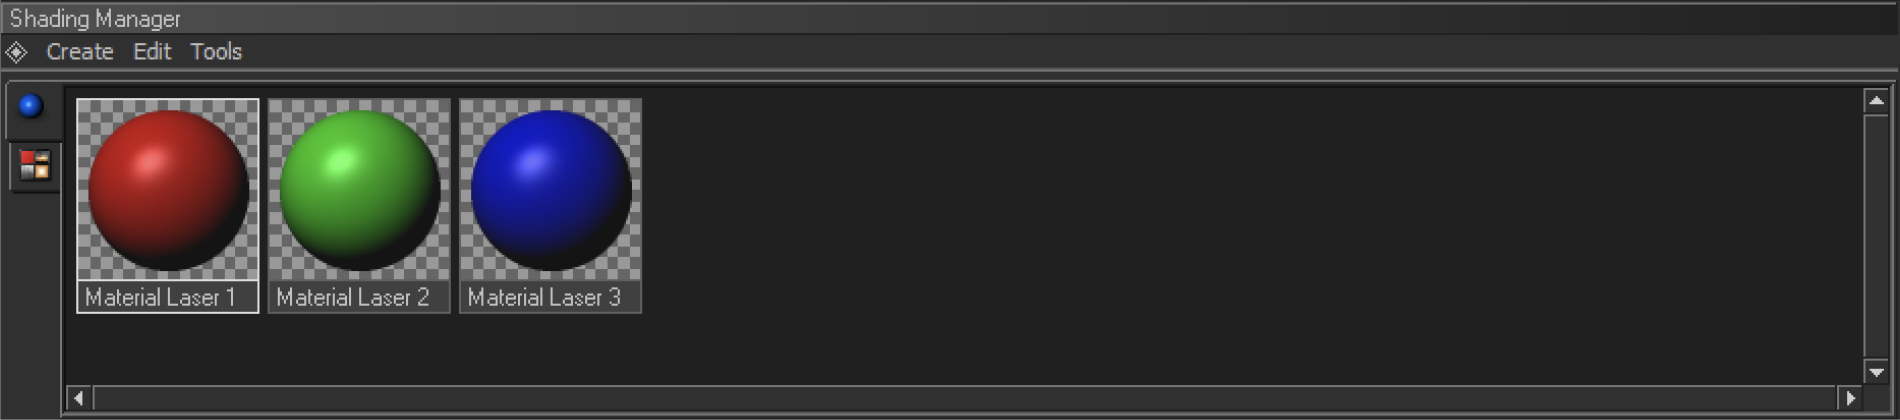
The shading manager is where you texture or assign diffuse textures *single color textures* to an object. To make a Laser Material you click the create tab and click: Laser Material
The laser Material is a diffuse texture. To use images and various other kind of texture options click the following tab in the far left of the shading manager, it looks like this:
![]() .
.
Selecting this tab gives you different options when you click create.
When you select 2D bitmap you can import an image and use that as texture.
Please note that you should go to the render setup and look under the “Default Line Color” tab Change the color mode from “Object’s Color” to “Light Shading”.