
Tools
Support
Pangolin Family of websites
Pangolin Laser Systems, Inc.
Kvant Lasers
Unity Lasers
ScannerMAX
Lasorb
Tools
Support
Pangolin Family of websites
Pangolin Laser Systems, Inc.
Kvant Lasers
Unity Lasers
ScannerMAX
Lasorb
We have added a tab on the projector settings window for projectors which feature Beam Brush®. As there Is control parameters that need to be considered with a Beam Brush® projector. This tab Is exclusive to each connected piece of output hardware and is saved to the pc and can be saved to a file for future loading.
Even though all efforts are made in manufacturing to keep everything lined up perfectly and corrected, the reality of touring means things can get bumped and shifted, so to compensate we have added multiple features so you can correct and get the best performance from your Beam Brush® even after months of touring on the road, without having to open the projector to realign.
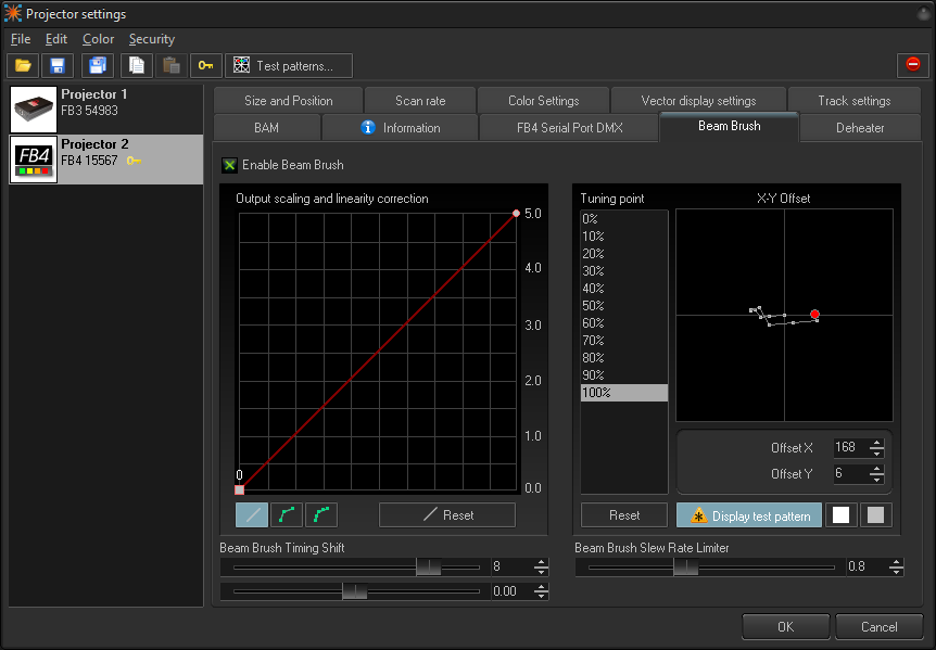
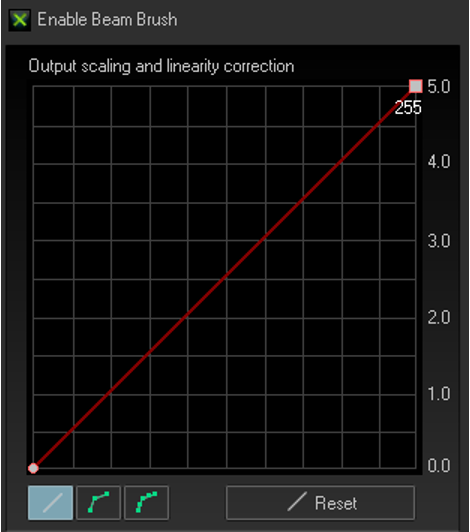
In Output Scaling and Linearity Correction we set a minimum and maximum brush size. Generally, this would be 0 and 255. The minimum can be used to set nominal If zero is no longer zero. While this is unlikely its not impossible. We can then use the maximum to set the maximum brush size on the projector. For most beamshow applications this should be at maximum. However, some long throw graphics projections may not want to use full brush size as it will be just blown out if the x/y scaling Is significantly different (in terms of projection size. Its recommended when programming to use full range, so on site the whole show can be rescaled down instead of needing more and there being no more left.
It is unlikely that this output scale would need a curve, as the brush mechanism is linear. However, we have added the option to curve your output scaling if needed. This works just like the advanced color correction curves.
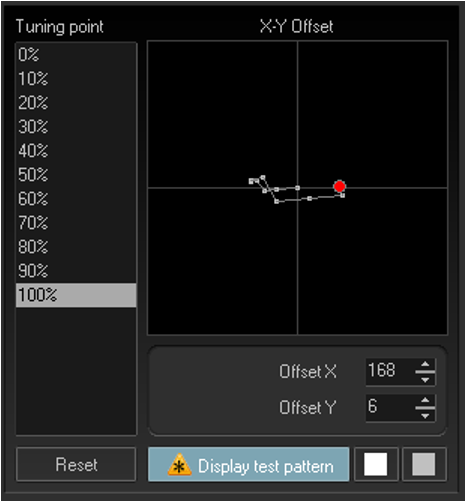
Beam Brush® systems as they move through brush values will create a slight X-Y shift in output. This can be minimized with perfect alignment, but in the reality of the touring world, this is unachievable, so we have added a X-Y compensation to tune this shift and make your output perfectly smooth. This X-Y offset is done before the output scaling and Linearity correction This means that it counts for the full 100% of the potential brush range. So, scaling afterwards will not affect X-Y Offset.
On the left you have percentage of beam brush value, and on the right, you have those points for their X-Y shift shown in a grid. To align use the test pattern to display the X-Y shift pattern, this will show a non-brushed square and a second square with the percentage of Beam Brush® selected. Scroll through the different percentages and use your mouse, or the value enter area to move the centerline for the brush. If you need to go beyond the visible graph, you can use the number input areas below the graph and increase the values further, beyond the visible graph.
You can adjust the colors for the test pattern using the two squares to the right of the display test pattern button. The first is for the non-brushed center, and the second is the color of the brushed square. This Is easier to display in video so check out our quick hints video on Beam Brush™ settings to see how to do this offset alignment.
For timing and shift compensation, we first have Beam Brush® timing shift, this is like color shift and changes how early the instructions sent to the Beam Brush® mechanism compared to x/y scanner position and color timing, as they all react at different rates. 4 is a good default shift for 3mm systems, up to 10 watts, and 6 is a good default shift for 5mm systems, from 10w to 40w.
The Slew rate limiter is a calculation that BEYOND makes to make sudden transitions between brush sizes actually look like a sudden change in real life, as the Beam Brush® mechanism is driven by a scanner it does take (while very small) time to change positions. A slew rate of 1.0 should work for the default maximum brushed size that came shipped with your projector, however if you have changed the minimum and maximum size of the brush from a hardware standpoint with tuning, you may need to adjust this, lower number for less overall brush, and higher for higher overall brush.

The Beam Attenuation map has been used for years as an effective and useful tool to change the overall brightness of an area of a zone mainly for safety reasons. We have now added the same tool, but for Beam Brush®, so you can use brightness of a laser, and divergence in conjunction to create a safer show.
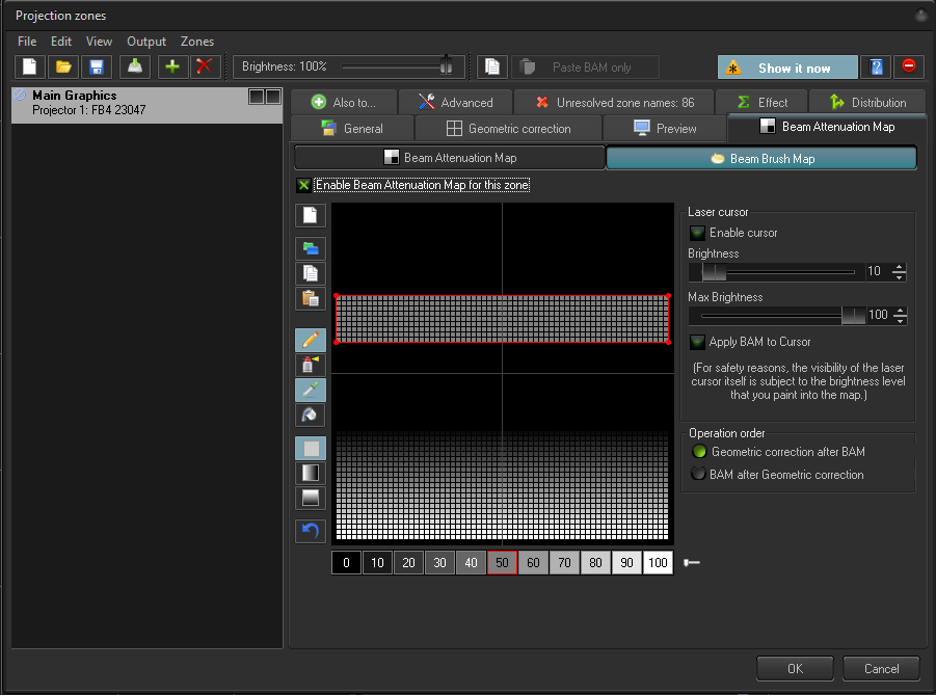
The Beam Brush® map is in projection zones, under “Beam Attenuation Map”. We have added a second option which is called the “Beam Brush Map”. This works incredibly like the regular Beam Attenuation Map, however instead of overall brightness, we are controlling the percentage of Beam Brush® used.
In this tool, 0 means no divergence (nominal divergence) and 100 means maximum divergence, this is scaled based on projector settings.
The other tools included here are the same tools for the standard Beam Attenuation map. with the laser cursor, and the operation order.
The configuration window can be found by going to “Settings> Configuration…” The configuration window is where you can modify many of the functions of BEYOND and how it operates for you, we have added a couple Beam Brush® related options to this window
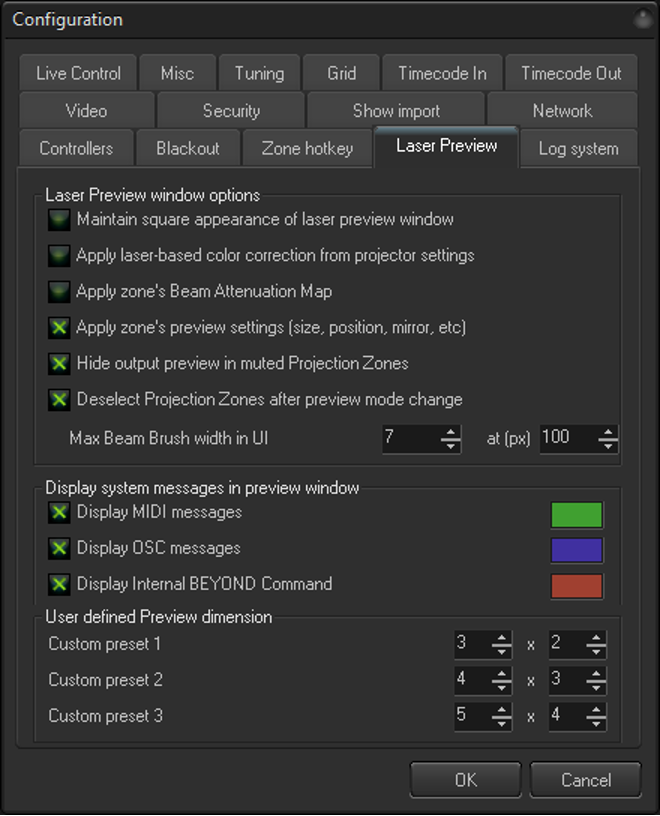
The laser preview will visualize Beam Brush® size. Use the “Max Brush Width in UI” to adjust the scale of brush in pixels. The default we recommend for most users is 7 at 100 pixels. You may need to increase the value if you have a higher resolution monitor or lower It if you have a lower resolution monitor.
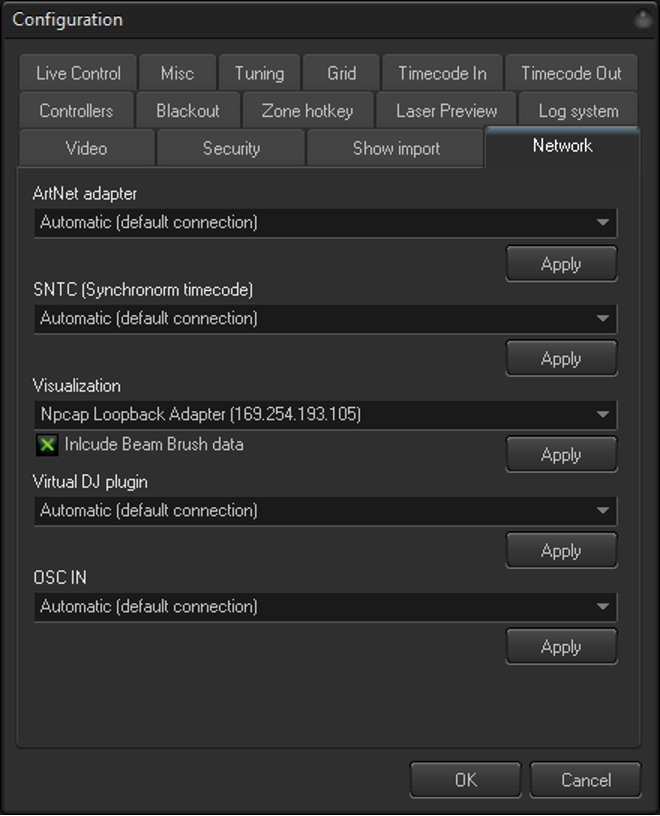
Not all visualization software will support the Beam Brush® data. While we hope most visualization software companies will eventually add Beam Brush® visualization, we have added a check box if there is a compatibility issue. Disable If your visualization is having trouble or you know your visualizer does not support Beam Brush® visualization.
The Frame analyzer Is a great tool for people to check the performance of their cues and frames without having a projector to check.
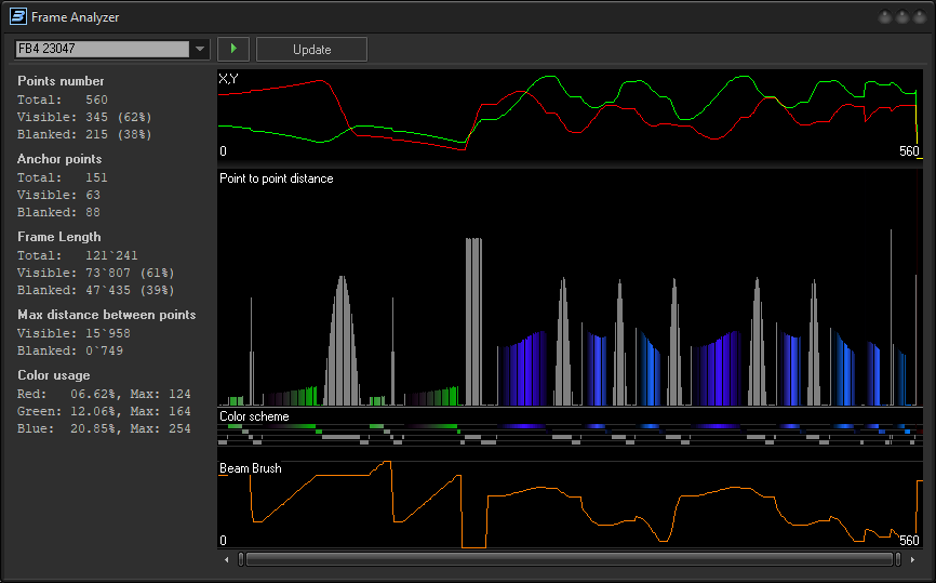
We have added Beam Brush® to this window to help you check the potential performance of your cue even if you do not have a Beam Brush® projector at your immediate disposal. The Beam Brush® device moves like an x or y scanner, so we represented it like so. It is always a good idea to check this to make sure your scanners and Beam Brush® will be able to handle what you are asking of it in the cue.
Sharp changes in the Beam Brush® line will be handled by the Slew rate limiter in projector settings, so just keep a look out for those large changes and know points will be added for the slew rate limiter to change positions, you can see it In action near the middle of the example photo above, a few extra points are added for this time.
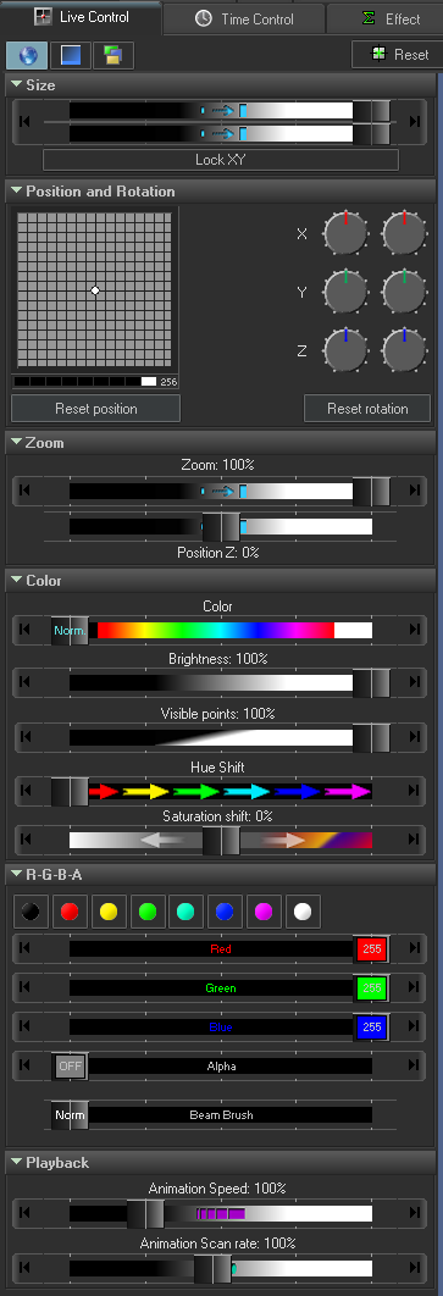
The Live control tab is where you can control overall parameters of your content as a global override and is the values you would change when you run a midi controller.
We have added a slider for Beam Brush® under the RGBA dropdown. This can be used on screen or mapped to midi controller.
This slider is additive and will add the slider value to the active cues, so if the cue has no Beam Brush® then each point will be the slider value. If a cue already has Beam Brush® sizes, we will add the slider value to the already determined brush values in the cue. When a point in the cue becomes 100%, it will just stay at 100% even as you increase the live Beam Brush® slider value.
This is also now a master slider in the object tree, so it can be used in pangoscript, object animator and more. Its pangoscript code is “BeamBrush 0” 0 being the value, in this case overall percentage of brush.
The Advanced frame editor Is where you can draw laser frames for everything from character creation, logo drawing, and mapping shapes. You can also hand draw laser beam frames, and acts like a photo editing tool like photoshop, or drawing applications like Inkscape.
Advanced Frame Editor
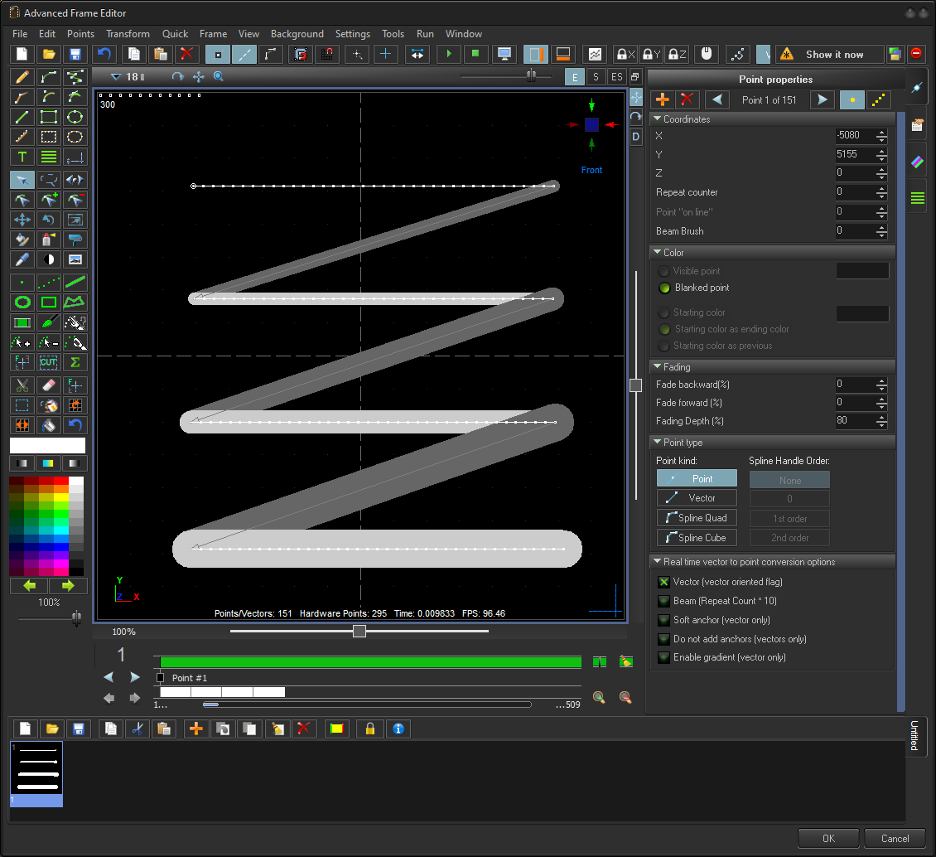 The advanced frame editor has added Beam Brush® features. On the left below the color selection you will see a slider, this is where you select the brush value you want to work with. This size will be applied to any new lines drawn while its selected.
To change the brush values of lines that are already created, you can use all color tools like the, “recolor object”, “spray recolor”, “recolor (rectangular)”, and “paint brush tool” by holding alt while using them. They will act for color if not holding alt, and will act for Beam Brush® if holding alt.
Oscillator effects work by creating a wave like signal over the span of points, just like waves modify points position, Beam Brush® oscillator modifies the brush value for points in a wave motion.
Beam Brush® Oscillator

Beam Brush® Oscillator is an effect which will modify the Beam Brush® value of points in a shifted wave pattern. You can control the amplitude, which is the brush value maximum the wave will go. You can change the number of waves total over all points. You can change the speed of which the waves will move through the points. You can shift the start time and position of the waves.
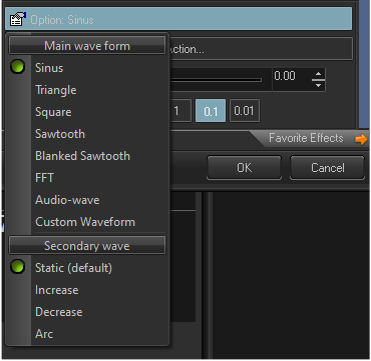
Under option dropdown, you can change the wave type, including: Sinus, Triangle, Square, Baked Sawtooth, FFT (for inputs), Audio-wave (for audio input) and custom waveform to draw your own waveform.
You can also choose options for a secondary wave.
Oscillating Effect type effects move parameter values from a start and end value over time. All oscillating type effects have a start vale, finish value and control over the time, and linearity of the from and two positions.
Beam Brush® (Oscillating effect type)
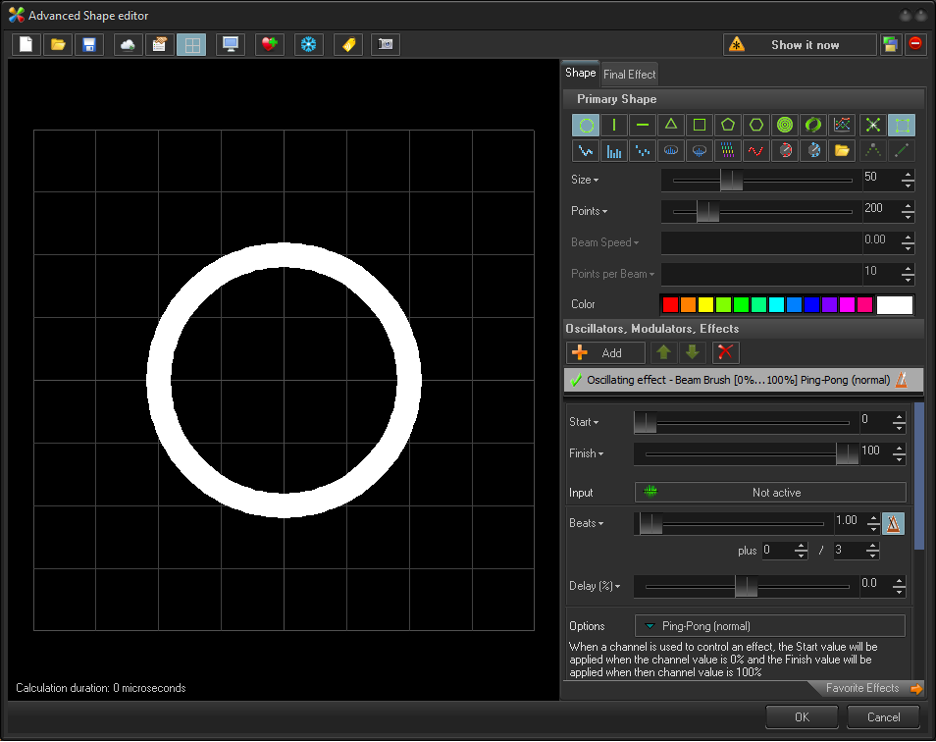
Beam Brush® (Oscillating effect type) will modify all points brush value. Using the start to finish values, you can animate between these values repeatedly over the time set in the beats, or seconds slider. You can also use the delay slider to change at what point the animation will start.
Under the options dropdown you can determine the curve of which the oscillating effect will modify the points by, between the start and finish values.
Color type effects modify a frames' points by utilizing a keyed-out percentage, this can control brightness, color, texture (power) and now Beam Brush®. All “color type effects” have the same parameters and can be interchanged.

The Beam Brush® (Color effect type) modifies the points of the frame over the percentage area where you can key values. This unlike most key effects can be splayed over the points, the x, y and z axis, radius, time, and angle. This effect type is most used for color control, but now can also be used with brush value. Because It is the same effect type as color, it has all same parameters as color, brightness, and power, and can be interchanged.

Key Type effects modify a frame based on parameter values over a period of time, in that time you can create multiple “keys” where you enter those parameter values over a mini timeline. The mini timeline can be modified by time, in beats or seconds, and you can even add accelerations and speed variations between “keys”. While parameters in each key effect are different, the mini timeline, “key's” features and time variation stay the same.

Brush value key effect just lets you change the total value of the frame over the keyed area.

Brush offset will shift the total brush value of each point in the frame based on the value in the key.
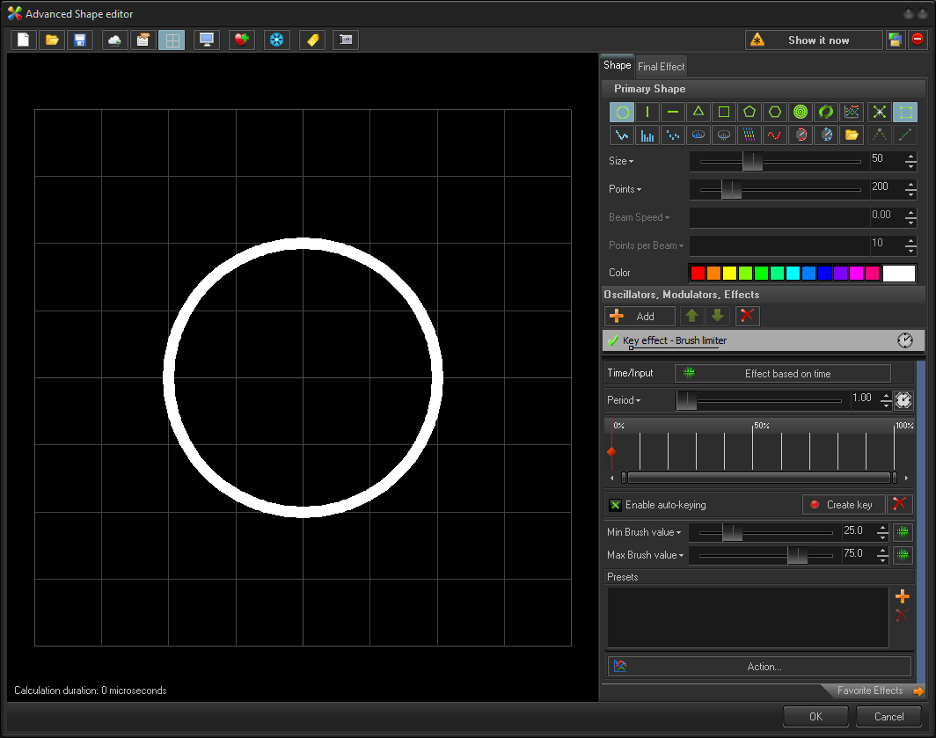 Brush limiter will change the minimum brush value of the frame, and maximum value of the frame. This can be used to change the brush value of an object without overriding previous brush effect values like color type brush effects. This modifies all points Inside the frame.
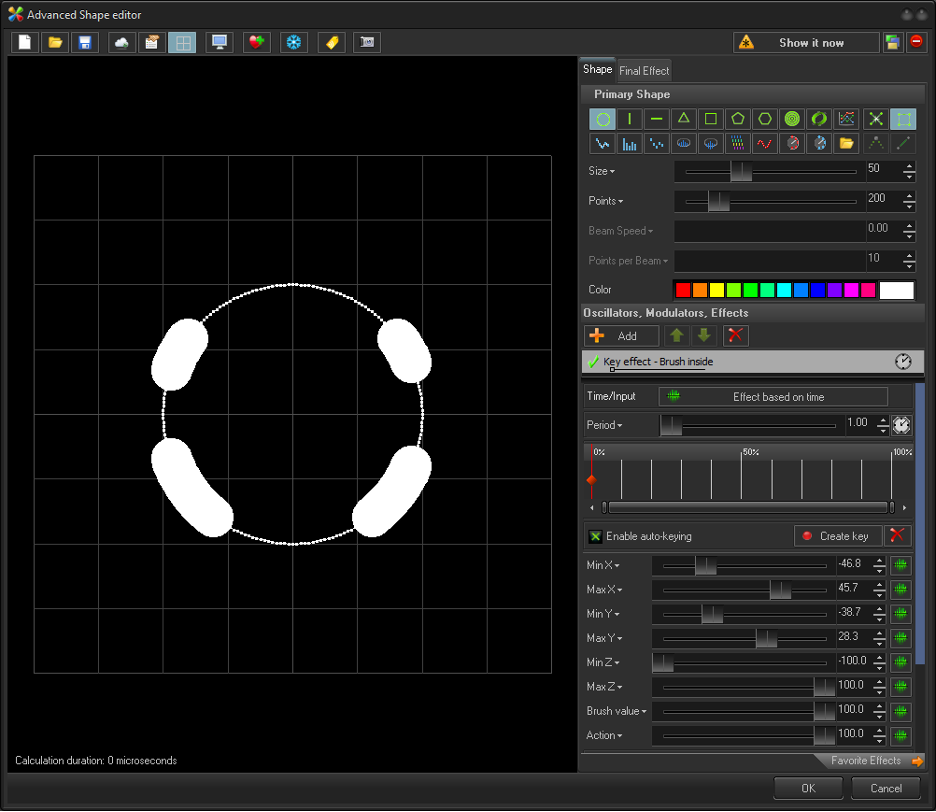
Just like window clipping and masking, we can change the brush value in inside the square shaped area determined by the minimum and maximum x axis and y axis. and you can set the brush value Inside that square.
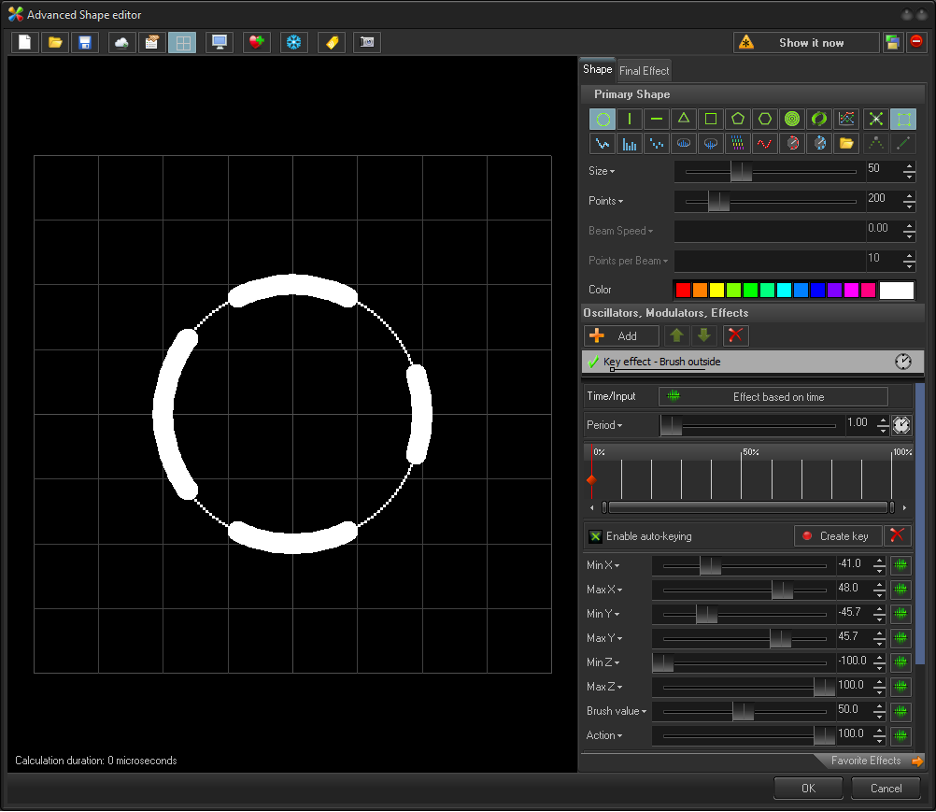
Just like window clipping and masking, we can change the brush value in outside the square shaped area determined by the minimum and maximum x axis and y axis. and you can set the brush value outside that square.
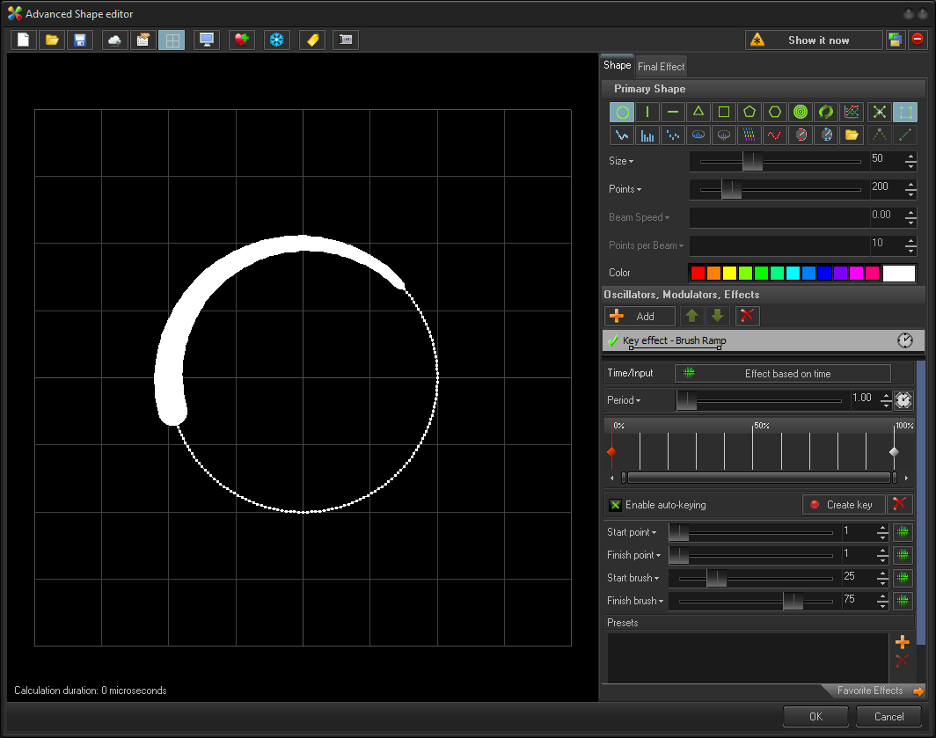
Brush ramp lets you set a start point of the frame, the end point of the frame, and ramp between a start brush value and end brush value this acts similar to how a color effect would modify points, but instead is done in a key effects to allow you animation between keys.