
Tools
Support
Pangolin Family of websites
Pangolin Laser Systems, Inc.
Kvant Lasers
Unity Lasers
ScannerMAX
Lasorb
Tools
Support
Pangolin Family of websites
Pangolin Laser Systems, Inc.
Kvant Lasers
Unity Lasers
ScannerMAX
Lasorb
There are 3 main parts to the Live Control Process – change of Content (Frames, Shapes, etc.), change of Effects, and change of Destination. Destination means – where the content will go, to which Projection Zone. Let's talk about Projection Zone assignments. In non-Real-Time Mode, in the Timeline, we have time to work on setting up the Projection Zone Assignment. In a Live Play, situation, we need to make it fast, ideally, in one click.
In the Timeline Mode, you can use a Zone Chase Effect, it will work the same. The Destination, is a form of Zone Chase Effect with a special implementation of how it works, and where. The Editor is the same, but everything else is different
In Live Mode, we can use the Cues' Properties to assign Projection Zones to a Cue. When we click on a Cue, the Output shows up in specified Zones. It can be overwritten by Preview Panel Zone Selection and Manual Zone Selection. It is the second classic method to redefine the Routing. Destination simplifies the classic method and introduces a new method for Groups.
The Action of Destination depends on the Playback Mode:
A Destination cue is designed for Groups,for the ability to control Routing quickly, right inside of the Grid. A Destination Cue can contain static Routing or a Chase. By default, a Group uses Cue Defined Routing. As soon as you start a Destination Cue, it overwrites the Routing Path of ALL Cues executed within its' Group.
In Toggle and Restart Mode you can start one Destination Cue. As soon as you start the next Destination Cue, the currently playing Destination Cue stops. In Flash mode, the Destination Cue adds Routing, without stopping any active Destination Cue running in the Toggle/Restart model. It is a way to add some additional Routing. And finally, in Flash Solo Mode, the Destination Cue temporarily blocks the action of non “Flash Solo” Destination Cues, and defines the Output. From a technical point, it is simple - as soon as software detects the presence of a Solo Cue, the other Destination Cue in this Group will be ignored, and no longer involved in the Routing calculation.
Having a Destination Cue in the Timeline makes no sense because in such cases you should / could simply use a Zone Chase Effect. Therefore, Destination Cues don't exist in the Timeline environment. A Destination Cue is designed exclusively to simplify Live Operations, it is the only place where it supposed to be used.

You can add an Destination Cue by means of the Cue Context Menu > Create > New Destination, or by means of the Main Menu > Edit > Destinations.
A Destination Cue looks as in the screenshot below

The dimensional layout of the Preview Grid mimics the dimensional layout of the Preview Panel. If the Preview Panel is in 3×3 Mode, the Destination Preview will have same look. An Orange rectangle is used to represent the Projection Zone(s) that are going to be used for the Output. The Gray color used for other inactive Projection Zones.
A Destination Cue can be animated in the Preview if the Grid is in Group mode. Otherwise, you will see only the 1st step of the Destination Chase.
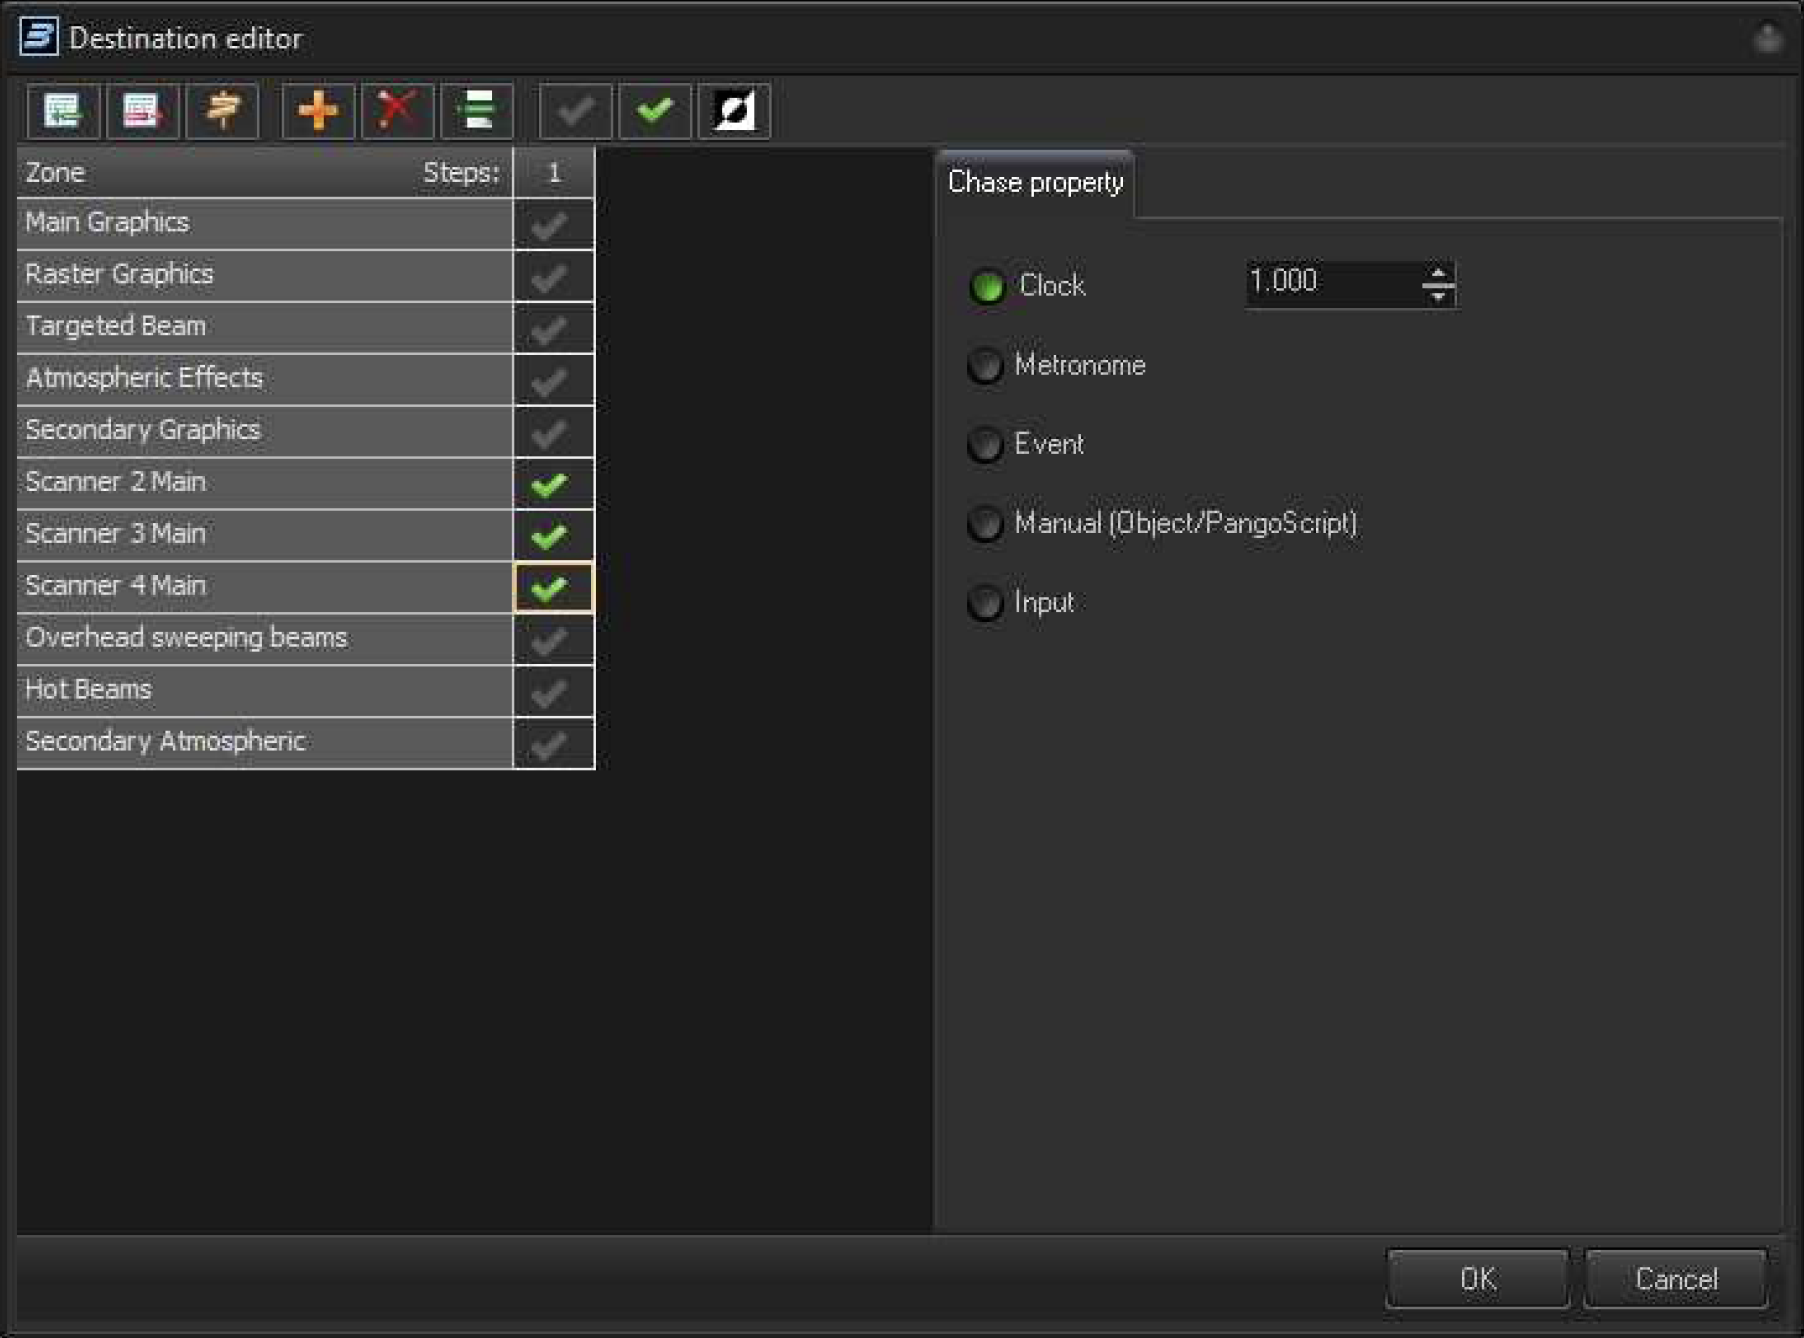
At a default start of the Destination Editor, it has a list of Projection Zones located at the left side and Time Settings at the right. A Destination Chase may use one or more steps. If it has only one step – there will be no need to change the Timing Settings.
The Toolbar Buttons have several groups. The first is for adding rows, you can add, delete or modify Projection Zone names in the Title Selection area of the list. The second group is for adding, deleting and inserting the Steps of a Chase. Third group is for changing the on/off State in a Chase. The list in fact uses a Grid component that allows the selection of multiple Cells.
Clock – defines the period of step change in seconds.
Metronome – defines the period of step change in beats.Event – defines the name of an Event that will trigger a change of step. The Event is a string identifier. There are standard identifiers as well, and you can use yours together with a PulseEvent Script Command.
Manual – the position of the Chase can be controlled by Script only.
Input – the position of the Chase will by controlled by an Input. It can be MIDI, DMX, and so on. In this case, number of Chase Steps linearly maps to the Input Range.