
Tools
Support
Pangolin Family of websites
Pangolin Laser Systems, Inc.
Kvant Lasers
Unity Lasers
ScannerMAX
Lasorb
Tools
Support
Pangolin Family of websites
Pangolin Laser Systems, Inc.
Kvant Lasers
Unity Lasers
ScannerMAX
Lasorb
BEYOND supports incoming TimeCode which may be received from several sources:
| MIDI | MMC (Output only) |
| MIDI | MTC (Input and Output) |
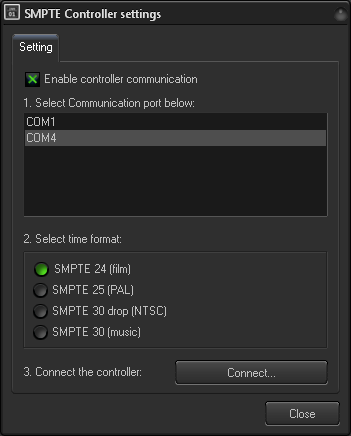
| SMPTE | SMPTE reader such as TC2000 or Aquilla (Output only) |
| ArtNET | ArtNET timecode (Input and Output) |
| Synchronorm timecode | Synchronorm timecode, used for rendering in Realizzer. |
Only one time code type can be used at one time. Independently, in the timecode source, BEYOND transforms the time data into an internal format and processes it equally. What this means, if there are two stages, the 1st stage is the communication layer, and the 2nd stage is using the time code data.
The time code data can be used to trigger a Timeline Show and that Timeline Show can be played from the Timeline editor, in the cue Grid, or in a BEYOND Play list.
If you own a TC2000 Serial Sub-D 9 pin version and in BEYOND you are not able connect to the TC2000, while you are able to read Timecode through the external time-code writer utility. Download THIS MICRO UTILITY , and run this utility in the background while using BEYOND. Then timecode will be pushed into BEYOND.
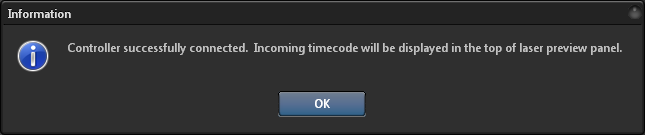
After the SMPTE Connection test, click on Close button. If incoming timecode is being received, you will see the time value in Preview panel of BEYOND.
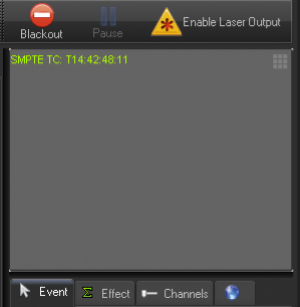
The green label “SMPTE TE: XX XX XX XX” is a confirmation of the fully functional incoming timecode. If there is no such label then the timecode is not being received and there is some problem at communication stage.
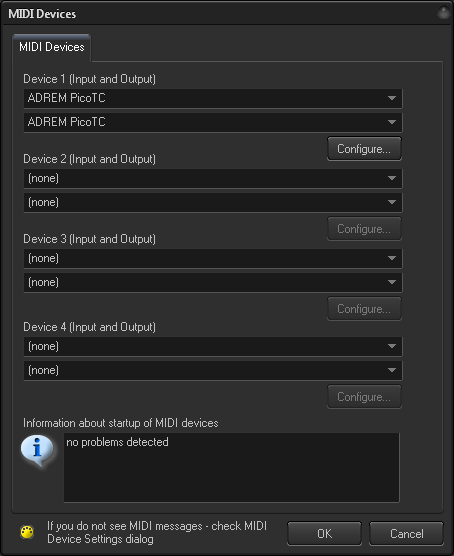
The timecode for MIDI does not require any special settings configuration. The type of incoming time code will be detected automatically.
The confirmation of incoming timecode will again be shown in the Preview window:

For using BEYOND with SNTC Time code, enable it within the Configuration settings menu, under the “Timecode” tab. Put an “x” in the box for “Enable SNTC Synchronorm Timecode”.
The confirmation of incoming timecode will again be shown in the Preview window:

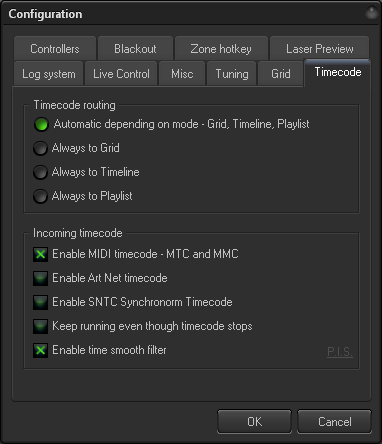
Please verify your TimeCode Settings before using the TimeCode to run a show. Main menu – Settings – Configuration.
Timecode routing defines where in BEYOND the time code will be delivered. The default option is “automatic” which will deliver the timecode to the Grid, the Timeline or a Playlist depending your current view mode. If you need the time code to only be routed to a Timeline or a Playlist, you must choose that corresponding option.
“Enable MIDI timecode - MTC and MMC” only set this option ON if you are using MIDI time code. Otherwise the recommended state is OFF.
“Enable Art Net timecode” - only set this option ON if you are using ArtNet time code. Otherwise recommended state is OFF.
“Enable SNTC Synchronorm Timecode” - set this option ON only if you need to synchronize BEYOND with Synchronorm software.
“Keep running even though timecode stops” - when this option enabled, BEYOND will continue the show playback even if the incoming timecode signal is lost, or stopped. This option allow the show to continue playback even if there are some drops in timecode signal. When this option is disabled, BEYOND will stop the show playback after 1 second of timecode signal timeout.
“Enable time smooth filter”. BEYOND can use the time (from timecode) directly. The time value coming from the TimeCode Controller will be used over and over again until a new value has been received. An alternative solution is based on BEYOND detecting the timecode speed and following the time code as close as possible. In this situation, BEYOND will not just wait for next time code value, it will continue to play the show based on the TimeCode speed it detected. As a result the time is always going forward and moves smoothly. The time smooth filter should be enabled in all cases, except when you need the show to stay in some exact time.
Once communication between the TimeCode Device and BEYOND has been verified, and you see the timecode value in showing in the Preview panel, you then need to make a few final settings to have TimeCode trigger show playback. You need to enable TImeCode in the Show properties and enable “TC-IN” on the Timeline toolbar.
To enable the time code within the Timeline Show properties, click File→Show properties→TimeCode input tab). After that setting is changed, the timeline will be able to react to incoming timecode. This setting change is required for using a TimeCode triggered Show from within a cue in the Workspace Grid. A Timeline Show without this setting enabled will start right after the Cue is clicked on. A Timeline Show with this setting enabled will go into waiting state when clicked on and will start only after timecode is received.
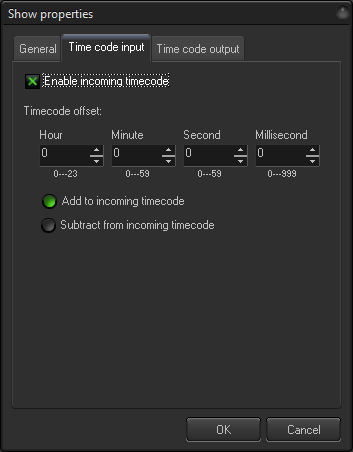
The timecode enabled setting is one of Show properties and must be set for each Timeline Show you want to react to TimeCode data, Do not forget to save the Show file after this setting has been enabled!
Once you change the Show properties to enable timecode reaction, then a “TC-IN” button will appear on the Timeline tool bar:

The TC-IN button has been added because of safety reasons. When a Show has TimeCode enabled the Show playback will started as soon as timecode data is received. If you will click the Blackout button, then playback will be terminated, but the timecode will start the playback of the Show again. For preventing such situations the TC-IN button was added.
IMPORTANT: Timeline Shows ignore timecode if the time value is out of bounds.
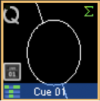
A Timeline Show with incoming timecode enabled has special TC icon when the Show is saved to a workspace cue:
After click on the Cue, a flashing “TC” text will appear in the cue. It means that show player is waiting for incoming time code data to trigger the cue.
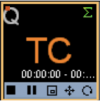
When timecode data is received then playback of the Timeline Show cue will start automatically. At the end of Show, the Cue playback will stop, and will not react anymore to incoming timecode data.
BEYOND only allows the use of one source of incoming timecode. You can synchronize timeline to Media events OR to Incoming timecode. BEYOND will not synchronize Media events to incoming timecode due to a variety of reasons. We recommend using Media events as the primary source of timecode and allowing BEYOND to generate outgoing timecode. In this case BEYOND synchronizes a timeline according a Media event, and generates timecode to send to external systems.
Using outgoing timecode from is easier. Outgoing timecode can be generated by any timeline that has enabled option “Enable outgoing timecode”.
See documentation for the Configuration dialog menu that has tabs for Incoming and Outgoing timecode. All the physical settings for the timecode are located inside Configuration dialog.
Added for BEYOND 5.5, there is a new BIG timecode viewer window, it is located under View > Show BIG Timecode Window. This window only shows a large preview of current timecode Input and output, and will show multiple timecodes if multiple inputs and outputs are being used.


