Tools
Support
Pangolin Family of websites
Pangolin Laser Systems, Inc.
Kvant Lasers
Unity Lasers
ScannerMAX
Lasorb
Tools
Support
Pangolin Family of websites
Pangolin Laser Systems, Inc.
Kvant Lasers
Unity Lasers
ScannerMAX
Lasorb
Although Lasershow Converter 4D's default1) settings give good results for most scenes, it is still handy to assign point placement settings on an object-by-object basis. Below you will find some suggested settings for various scenes.
In the New York scene below, the arrows point to lines on the buildings that have a fairly shallow angle.

The default point spacing settings have the Corner points 165-170° value set to zero. But this might make this corner of the cube rounded as the camera changes positions. Therefore, it is best to set Corner points 165-170° to the same number as sharper (larger) angles.
In addition, depending on the view of the camera, parts of the cube might become very small and might start looking more like curves than corners. Therefore it may be desirable to increase the Corner detect value as well.
Here are the suggested settings for this particular scene, to give a consistent appearance as the Cinema 4D camera flies a path from far away to close up:
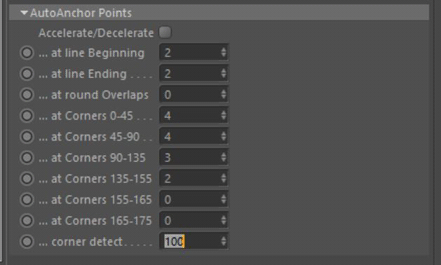
In Cinema 4D, a sphere, like most objects, is made up of a mesh. The number of segments determines how faceted the sphere is. (You might not see the mesh, since Cinema 4D's renderer can smooth the facets into a round sphere.) Here is a typical sphere:
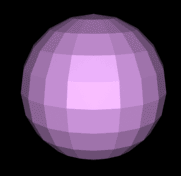
When this is rendered with Lasershow Converter 4D, you will see the facet outlines:
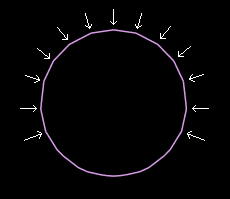
Depending on your point spacing settings, the angles between the facet lines might look like corners. If you allow corners of wide angles to be detected by Lasershow Converter 4D, you will no longer get a nice round laser path. Instead, you will have a polygon with sharp corners. There are two ways to make a coarsely meshed object always produce a round outline.
One way is to set the Corner points at various angles to a value of 0.
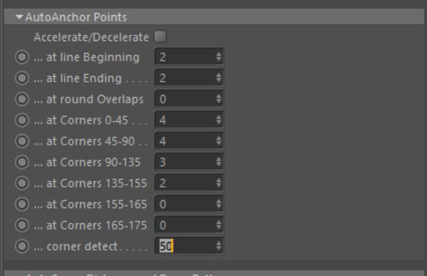
Another way is to simply reduce Corner detect to zero:
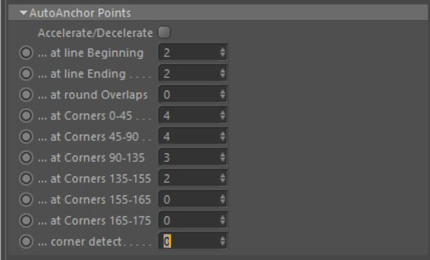
Once you have prevented corner points from being placed on the sphere outline (either by reducing the corner points or by reducing the corner detection) there is still one thing to note: there is still a varying amount of curvature in this image. From this camera angle, the bottom of the sphere is more rounded than the top of the sphere.
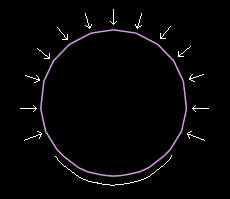
Although the corner detector will no longer put any extra corner points here, the curve detector will still place more points in this area. Moreover, as the camera angle changes, the facets will show up in different places and in different amounts of curvature.
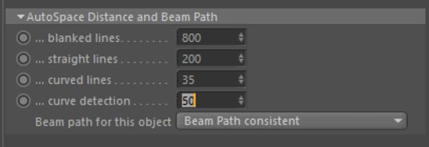
The default AutoSpace Distance (below) has a large difference between the Straight lines point density, and the Curved lines point density. In addition, the default Curve detect is set to a value of 50. With an object like this coarsely defined sphere, there will be drastically different point densities in different parts of the sphere.
A better setting for this situation is shown below. It reduces the difference between the Straight lines and the Curved lines point density. This ensures there won't be as many radical changes in point density as the curvature changes. In addition, reducing Curve detect reduces the sensitivity to curvature changes.
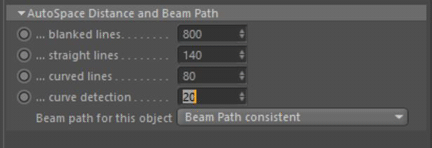
(However, having the point density be different will still allow Lasershow Converter 4D to adjust the point density based on the size of the sphere. As the camera angle changes and the sphere becomes smaller, a higher point density will be used.)
The Corner detect control can be used to differentiate between very small features that normally look like curves, and relatively large angular changes that look like corners. Here are a few scenarios in which it can be used.
The picture below shows a cylinder where you might want extra corner points. However, this is such a small detail that the cylinder might look to Lasershow Converter 4D as if it is just a small curved object rather than an object with corners on it. You can indicate that you want corners to be detected here by setting the Corner detect to a higher value such as 90 or 100.
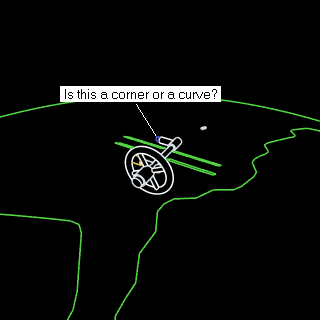
If you look closely at the picture below, you can see that the curved part of the mount is actually made up of line segments at angles to each other. If you have Corner points 155-165° set to a value of 1 or higher, Lasershow Converter 4D will detect this as a corner instead of a curve. Ordinarily you could fix this by simply setting Corner points 155-165° to 0.
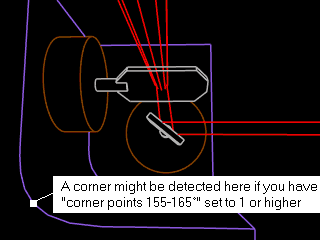
But what if there were instances where you wanted extra corner points at angles between 155 and 165 degrees? In this case, you can tell Lasershow Converter 4D that you still want corner points at these angles, but reduce the corner detection sensitivity by setting Corner detect to a lower value such as 10.
The Corner detect default value of 50 percent works well for most objects. However, if you see an object that has small features where you want corners but Lasershow Converter 4D is not detecting corners, you can increase this value. Likewise if you see a large curved object on which Lasershow Converter 4D is detecting corners but you would rather see smooth curves, the Corner detect value can be decreased.