
Tools
Support
Pangolin Family of websites
Pangolin Laser Systems, Inc.
Kvant Lasers
Unity Lasers
ScannerMAX
Lasorb
Tools
Support
Pangolin Family of websites
Pangolin Laser Systems, Inc.
Kvant Lasers
Unity Lasers
ScannerMAX
Lasorb
BEYOND software has several output color calculation modes. Internally, BEYOND operates with 24-bit RGB color. Different Laser Projectors may contain different number of lasers. Each laser has one color such as red, yellow, green, blue. A typical projector has one to three colors (R,G,B). High End Projectors may use up to 6 color channels. This raises a question: How to make as many as 6 color channels from 3 color channels in Beyond. For example, a projector has 4 channels - red, yellow, green and blue. How can Beyond make it work? In the RGB system we make yellow out of red and green. In the case of our example projector, we want to use a yellow laser instead of a mix of red and green. We may also want to get shades of colors, some of which may be difficult to accurately mix. Finally, we have some non-linear elements: A Laser with analog color modulation may have a non-linear response, and so could the diode driver. However, none of this is of relevance because BEYOND has been designed with very advanced color mixing and modulation controls.
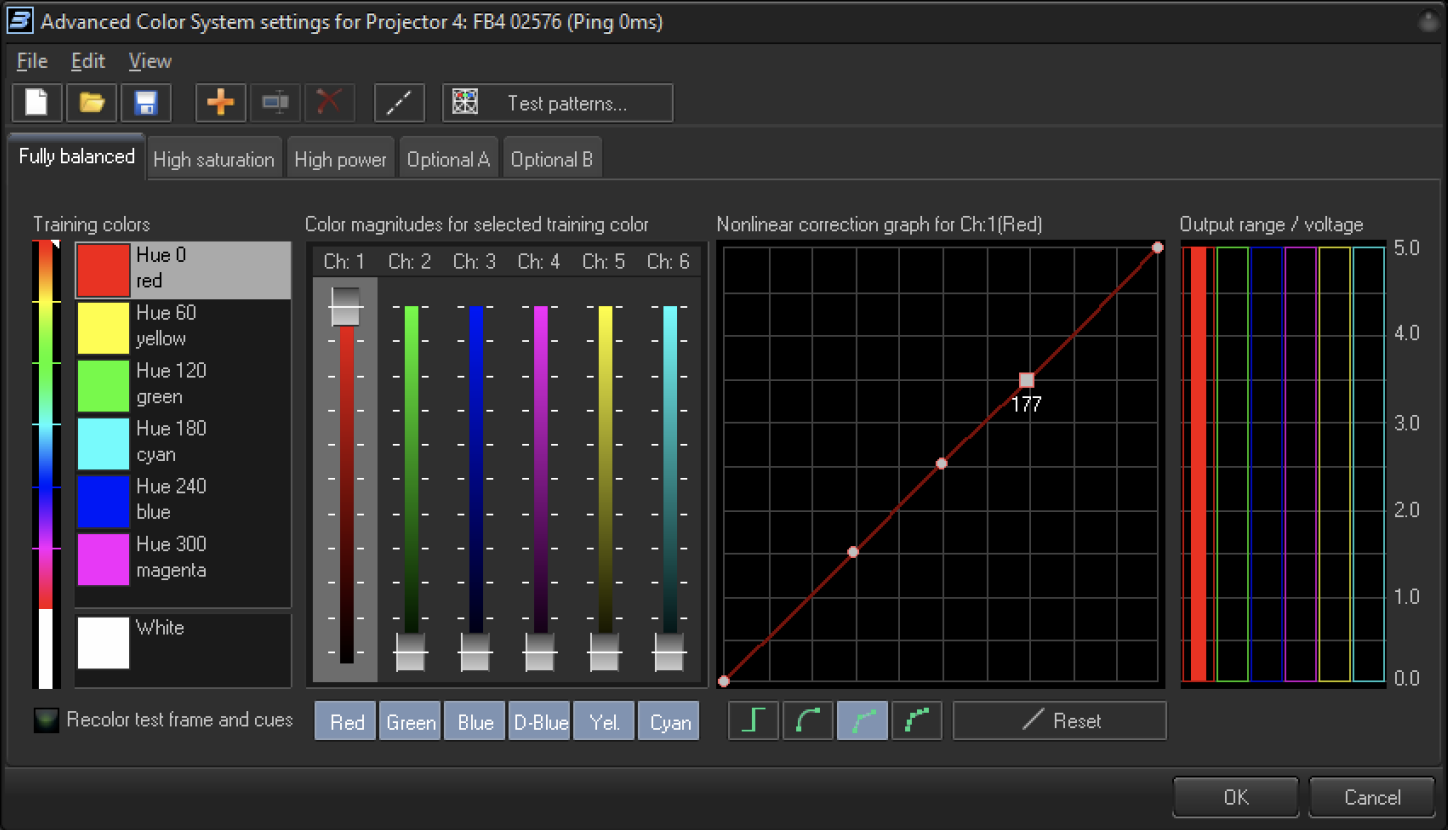
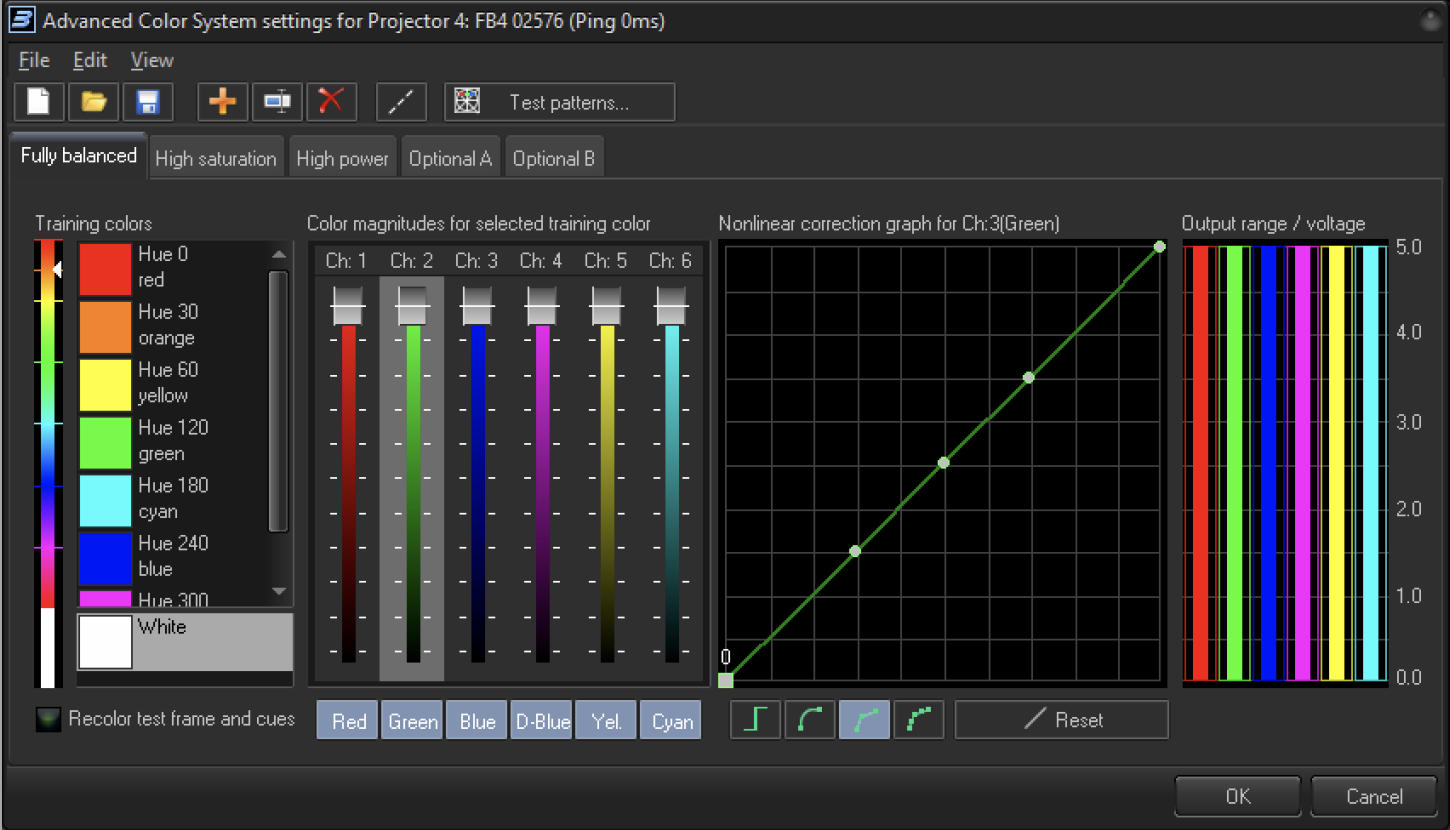
The list of Training Colors found on the left hand side of the palette training window, contains a list of the 6 most commonly tuned colors sorted by their hue value, plus White. White has it's own box a personal box, because it is a special case – it is a mix of multiple colors and is nearly always trained even if the other colors aren't. However, the list in Beyond, is not restricted to just 6 colors. Other training colors can be addedto obtain a more accurate result during calculation of shades between main colors.
There are 4 main blocks of controls (see the screenshot above). The List of main colors at the left hand side, the Color Magnitude Sliders that control the mix ratio of the available color channels, the Non-Linear Correction Graph, and the Output Voltage Controls which allow the adjustment of the output voltage for each individual color between 0 and 5 volts. To set the main fixed laser colors is easy eg To train the red color to the exact shade output by the laser module, only the 1st slider (red) should be set to 100% output and all the others should be off. To train the software to put out a shade of red other than that contained natively in the Laser Module, other sliders can be adjusted upwards so these colours are mixed in with the red to produce a new shade of red until the red matches the shade desired. Once set, this will become the default shade of red. The same rules apply to the other main fixed colors from the laser modules.
However, what about colors that can only be obtained by mixing eg. Yellow in an RGB projector? Let’s take look at Yellow color mixing (screenshot below).
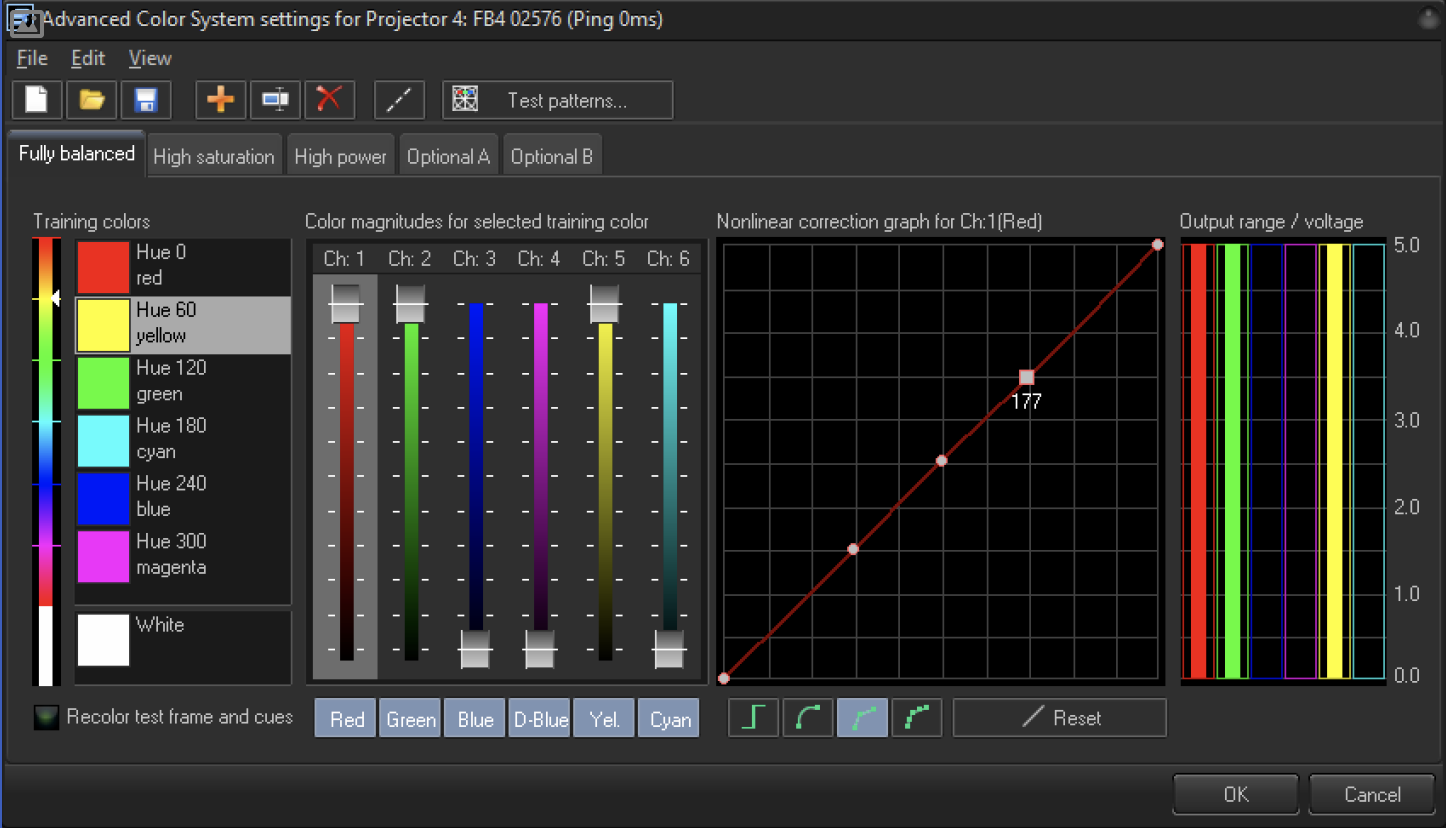
For Yellow training color BEYOND starts with 3 of the sliders in the 100% position. With an RGB projector, we make yellow out of green and red. That is why the Red and Green sliders are at 100%. However, if high end, the projector may have yellow laser, and the ILDA socket has a designated Yellow pin as well. That is why we also have Ch 5 (the Yellow Slider) at 100% too.
Now what if we are unhappy with the shade of yellow produced by the sliders at their settings above? In this event, we can adjust the sliders to vary the ratio the of Red to Green until we obtain the shade of yellow we require. If we can't obtain the correct shade by this method alone, or if the projector uses a dedicated yellow laser module, then we can start to introduce amounts of other colors into the mix by raising their sliders from 0% until we find the combination of colors that gives us the shade of yellow we desire. Once found the final color is set when we select another color to tune and close the tuning window.
It's also possible to save the final color palette out into a configuration file that can be reloaded at a later date should the original settings be lost eg as the result of a software update or crash. This latter course of action is highly recommended.
Now as another example of a fixed main color, let’s look at Green color setting:
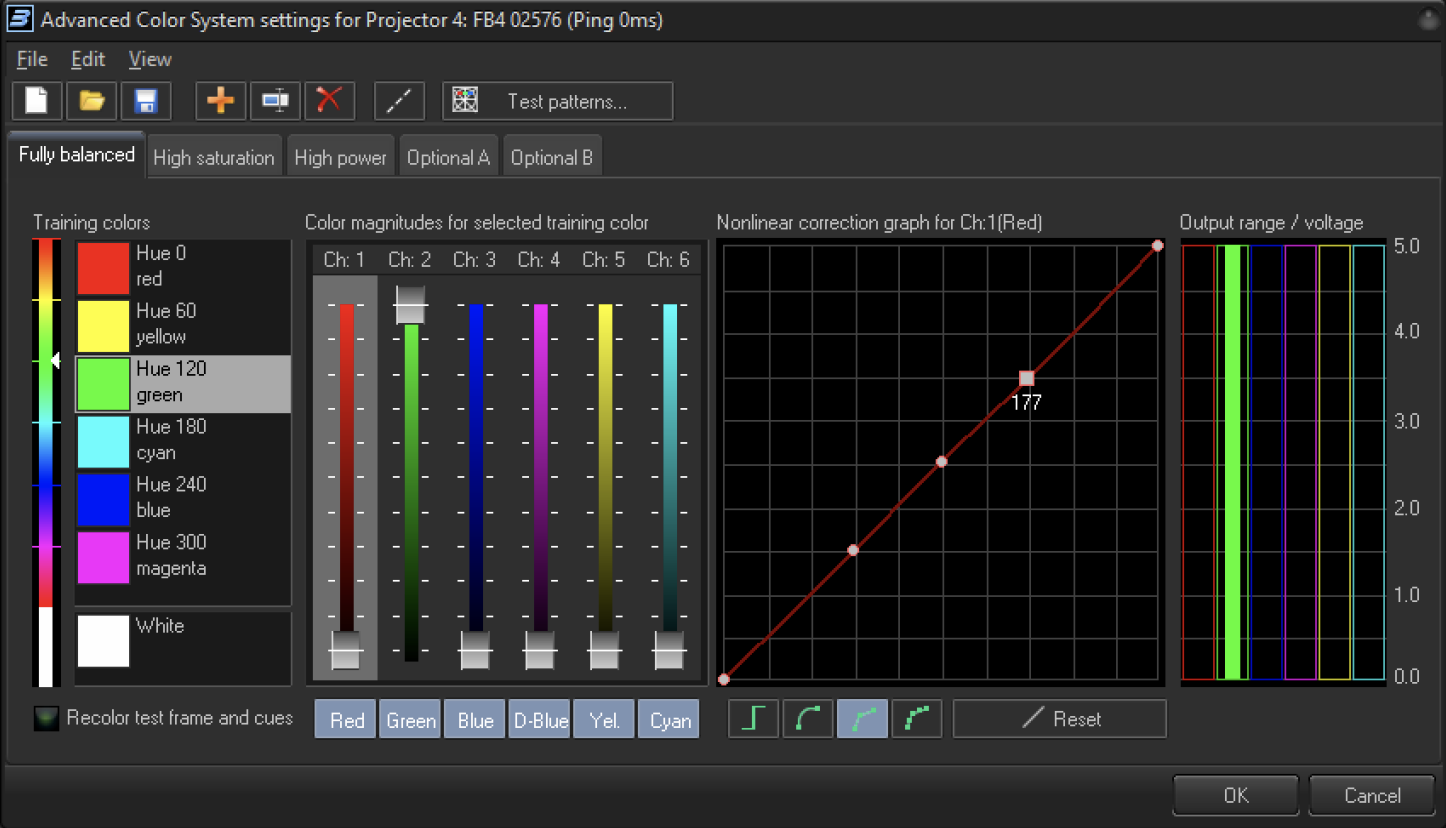
The Green slider is at 100%, and the other sliders/channels are all off. It is the same as for Red color mixing. By default, BEYOND assumes that projector has green laser, and if we have green color in frame, then we use green laser only.
However, just as for the yellow color above, it is also possible to vary the shade of green, despite it being a fixed color from the laser module, by introducing amounts of other colors into the mix. This again allows us to set a green shade that matches out personal preference instead of s imply being tied to the fixed color coming out of the laser module.
What if we want to add an additional training color because after training our main colors, we are still finding some other intermediate shades of color not to our satisfaction? The screenshot below shows how to add new training color.
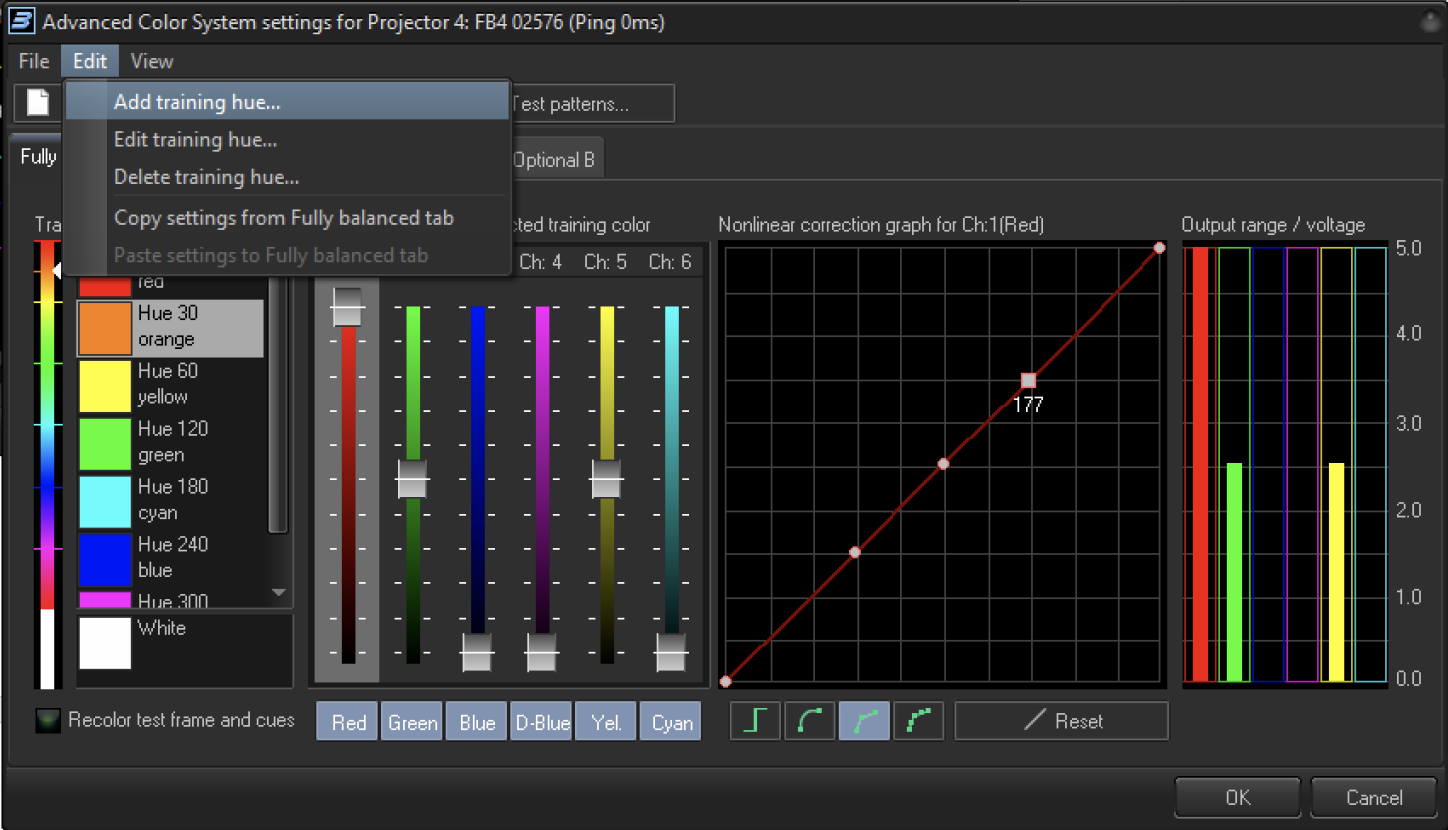
In this example, we want to set a new training color - orange. Orange is quite common as it can be problematic.
When we add orange to the Training Color List via the Edit Dialogue as shown in the screenshot, the program sets the default values for orange as 100% red and 50% green. However, just as with our other colors, we might want to add vary this ratio of red to green to obtain another shade of orange. We might also want to introduce amounts of other colors as well, should we fail to discover our desired shade by varying the ratios of red and green alone.
Ultimately the number of training required points depends on the number of laser modules in the laser, the linearity or otherwise of those modules under modulation and the tuning quality / accuracy requirements desired.
The number of points tuned will depend solely on how satisfied you, as end User, are with the results from your Laser Projector out of the box and how accurately those colors match the colors shown in the cue within the Beyond software.
If after tuning you are still unsatisfied with the result, you have two options: Either add more training points thereby bringing those errant shades under control, or if unsatisfied with several of the points you tuned, start tuning again from scratch.
And finally, white
In a Laser Projection, white is often the most important color as white can look off white or dirty if the mix of colors is less than ideal. Equally, different users have preferences for different shades of white - some like a warm white (a white with often a red hint), whilst others prefer an ice white, (a cold white with a hint of blue). In the nature, a white is a mix of a wide variety of differing wave lengths. In a Laser Projector, we have a limited set of lasers, so, our options are somewhat more limited. A typical problem for the white color is the different power of the projectors' laser modules, and our nonlinear eye sight. As humans, we are more sensitive to green than to other colors. We can’t change our eyes, but can change the laser power balance and thus the color mix.
Non-linear Correction Graph

The following steps will help you to set up the Linearity Correction Graph quicky.
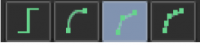
 Click on this button and move the 1st point (the far left one) up, moving it slowly. At some point you will you notice an X like shape. This X should be black/invisible. So move the graph point back down slowly unti you hide the black X completely. As a rule, you do not need to tune black color, but if your projector requires it, then you can.
There are several modes for the Correction Diagram.
Color Palette is a historical name. BEYOND does not operate with palettes in the technical sense of this word. However, this term is still used by the majority of laserists, and so we keep using it.

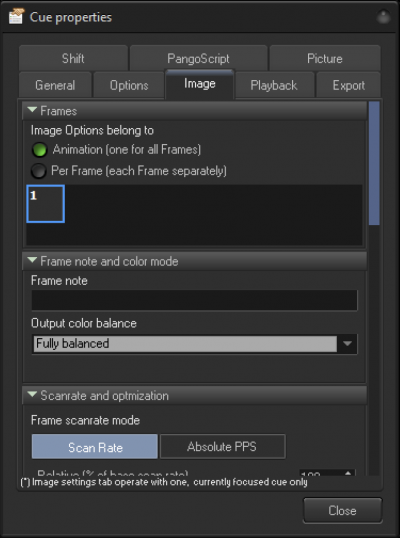
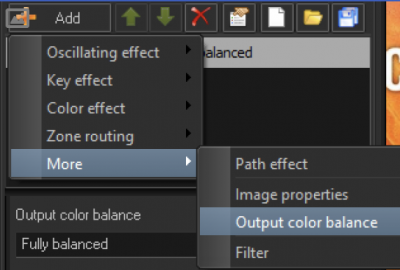
For graphics shows we need good balance of colors, nice color fades, and so on. For beam shows – we mostly need to get the most power from our projector. That is why BEYOND offers 3 standard palettes and 2 optional. It means, you may have several tuning presets and define each in the Image properties dialog. This dialog has several forms. You can see the Output Color Balance in the Cue Properties.
You also can set color balance by means of Effect or Sample Rate.
BEYOND stores color settings inside of the Projector Settings File. You do not need to save color settings files by clicking on Save button, and load it back. You can save and load colors settings if you want to use it somewhere else, or keep in saved for any reason. For BEYOND – it is just one of objects saved inside of the Projector Settings.
BEYOND saves the Projector Settings File automatically, as soon as you close the Projector Setting Dialog. The files are saved in the same place always: - BEYOND\System
Each file has the projector serial number in the name. The file name follows this standard:
Projector_A#####.BeyondProjector
Where A is the character corresponding to the hardware type and ##### is the 5-digit serial number of the controller.
BEYOND loads the Projector Settings File as soon as the controller is connected to the software.