
Tools
Support
Pangolin Family of websites
Pangolin Laser Systems, Inc.
Kvant Lasers
Unity Lasers
ScannerMAX
Lasorb
Tools
Support
Pangolin Family of websites
Pangolin Laser Systems, Inc.
Kvant Lasers
Unity Lasers
ScannerMAX
Lasorb
The Advanced Frame Editor in BEYOND has changed direction. Over its development, BEYOND has had 3 different Frame Editors. The first, a simplified version, came from QuickShow. The second Editor was a newly formed and highly complex Editor that some Users found confusing. In accordance with Pangolin's philosophy of keeping it simple, the Advanced Frame Editor found in Beyond 4.0 is a reworked and simplified version of the second “complex” Editor. It represents a step back towards the roots of the original Editor which were based in LD2000, whilst retaining advanced editing concepts such as Splines.
After obtaining the opinions of many of the most demanding professional users of LD2000, we were able to ascertain the essential features that need to be ported into the latest iteration of the Advanced Frame Editor. The classic features we have added are the:
The most significant new features added are:
Overall, the new version of the Editor is a cocktail of classic LD2000 methods, the best parts of the previous version of the Editor, and of course – new features.
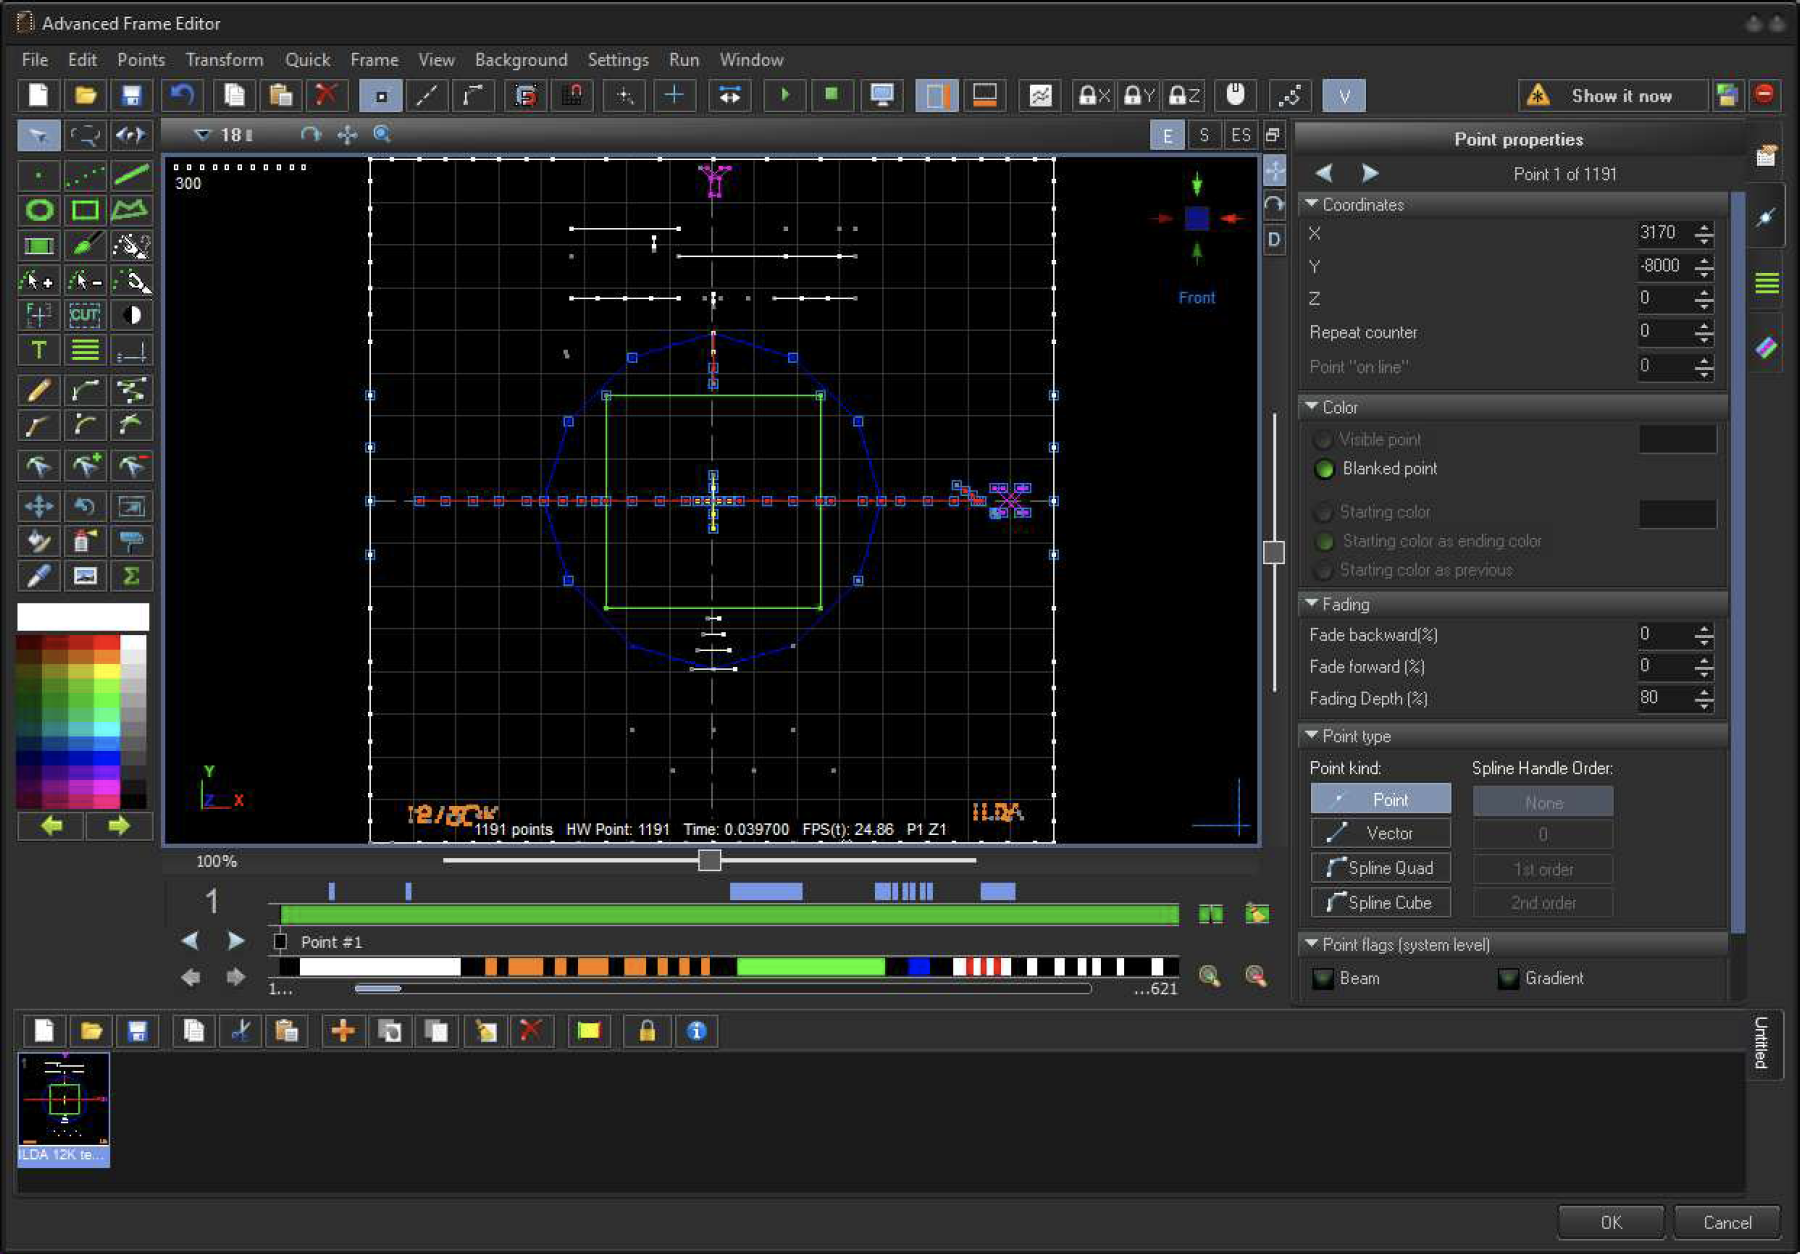
The Active Points Panel is located under the Drawing Pads. The original LD2000 version had 3 sections. The BEYOND version has 5.

This is purely an informational panel. BEYOND continues to use the concept of Selected Points, together with Active points. More about this later.

This panel indicates the Active Points in a drawing or animation. Active means that the Point can be changed. An Inactive Point is indicated by a gray color, and means – this point cannot be changed. The gray is a sort of protection mask that prevents modification. For example, when you apply an Effect or a Transformation to a Frame, only the Active points will be changed.
The Active Points Mask is independent from the Frame. This means the Mask is applied to all of the Frames when you do an operation within a block of frames. The Active Point Masks stay unchanged when you from one Frame to another. The Active State is not a option of the Frame or a Property of the Frame. It is a property of the Editor. This is the main difference between Selected Points and Active Points. (Selected Points are those currently selected. Active Points are all the Points that are available to be selected including any currently selected).

The Point Position Slider indicates the currently selected Point in the Frame. The Current Point Parameters are are shown in the Point Properties Tab at the right hand side, and used in menu commands such as Add Point, Delete Point, etc.

The Color Panel displays the Point Color, from the 1st point to the last.

This is an extension. In LD2000 Points could be displayed within pages 400 at a time. By contrast, BEYOND uses the whole width of the panel, and allows you to scroll to select a visible area.

Zoom Buttons. These can be used to zoom in and out, and simplify navigation.

The first button – adds or deletes a marker in the Active Point Line at the current position of the point cursor.
The second button – deletes all the Point Markers. Both buttons duplicate LD2000 functionality.
 Point Number Indicator.
Clicking on the label here will reveal a dialog box for the manual entry of a Point Number. The first set of arrows, navigate to the previous or next point. The second set of arrows, navigate to the previous or next view page.

The Frame List now has it's own Toolbar. In the previous complex Editor, it's incarnation was a source of confusion. For example, the Copy Button. Was it going to copy Points, or Frames? The new Frame List has it's own toolbar to simplify tool choice as well as a context menu to eliminate any confusion.
Frame List has a multi-select option. Click on a Frame, hold down SHIFT, the use the arrow keys to go left or right. The selected Frames are indicated by a blue hue. Block Operations will now be applied to ALL THE SELECTED FRAMES.
The Toolbar Buttons offer a set of classic operations with Animations

New, Open from file, Save to file.

Copy selected Frame, Cut Frames, Paste Frames.

Clear Points of current Frame, Delete Frames Add Frame, Duplicate current Frame, Insert empty Frame after current,
![]()
Select all Frames

Security Settings and information about current Security Settings.
The full set of commands is also available in the Main Menu, at the top of the Window. The Menu File and Frame File concentrate commands for Frame operations.
Hint: You can open multiple Animation files as tabs. It will help to copy/paste Frames between Animations.
LD2000 tools are Point Oriented. A Right Click on the Tool Button calls the Auto spacing dialog. There is a new indicator of the current spacing setting located at the top/left hand side of the drawing pad:
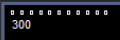
This indicator shows spacing in numerical form, and visualizes it as sequence of rectangles. It is visually the same as if you drew a horizontal line.
The Quick Menu has two helper shortcuts:
It gives you a quick way to change the spacing without using the Auto Spacing Tools.
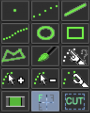
With some exceptions, the Drawing Tools work in a similar style to LD2000. There are some general remarks. Tools like Size, Position, Rotation have not been ported from LD2000, because BEYOND already has its own equivalents that function well. The Tool “Stream close” is not necessary as “quick spacing” allows to the User to change spacing quickly. And finally, Flip/Flip can be performed in one operation: - you can use the CTRL button to flip a frame around on its' X axis.
Everywhere in BEYOND, Effect is used as a real-time Tool. However, this is not the case in the Frame Editor. In the Frame Editor, it works differently. The Effect takes Frame Points, modifies them, and then puts them back. Modifications happen one frame at a time during the design period. Exactlt the same process happens when you use other Tools, such as Recolor, Move and so on. Every tool in the Frame Editor modifies the Frame, and Effect is no exception.
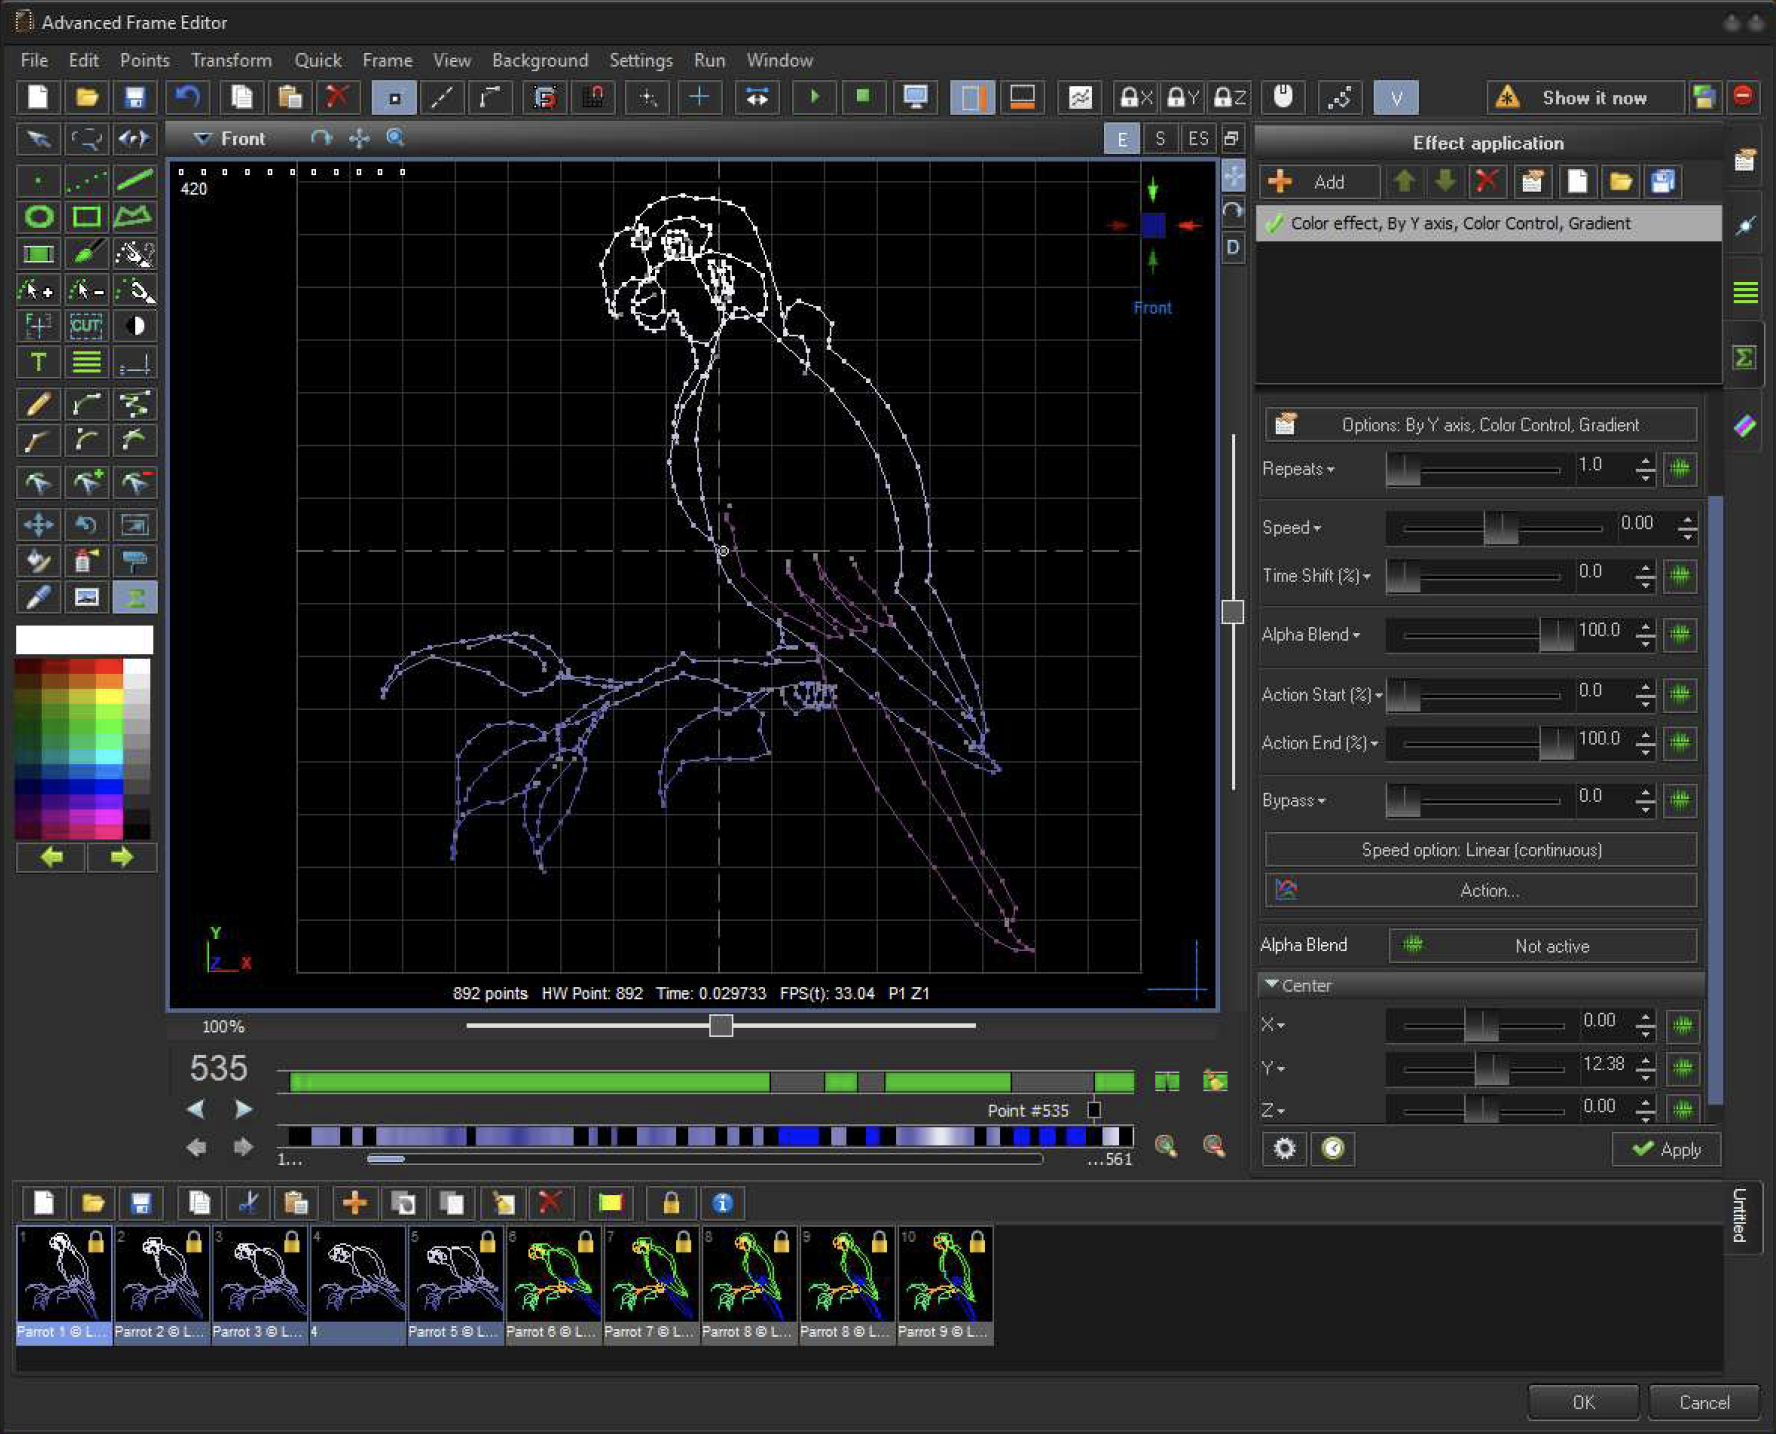
Sequence of steps to use the Effect Tool:

![]()
List of presets. You can collect your favourite / typical Effects and keep them for later use.
![]()
Recently applied Effects. Every time you click on Apply, BEYOND saves the Effect into the history file of Recent Effects.
There is some complexity in this area. The Calculation Path is pretty long and at the end we have multiple processing filters including Window Clipping, Vector to Point Conversion, Multi-tracking, Effects inside Zones, “also to” and so on that affect the final point count. So the final number of points, depends on multiple factors.
The new Frame Editor is a special solution based on the idea of Editor. A special module calculates the Frame as if it were the only Frame on Output, and composes an Output Point Stream equal to final hardware Stream. This Stream is used for Scanner Simulation and for Point Count, and FPS calculation. If the Frame has Vectors then the result depends on the Projector Settings.

The Number of Points is located at bottom of the Drawing Pad. The first parameter is the number of Points or Vectors in the current Frame. “Hardware points” means the number of Output samples/Points. Time and FPS values are calculated from the Projector sample rate (or Frame sample rate) and the number of Points.
Be Aware, FPS is a dependent parameter. It is a ratio of the Point Number in a Frame and the Settings of the Projector. If the Projector sample rate changes then it will also influence the FPS.
The Drawing Pad Title Bar has 3 buttons:

In addition to Simulation inside of the Drawing Pad, you can use the standalone window of the Frame Editor, ERP window or EmuLaser.
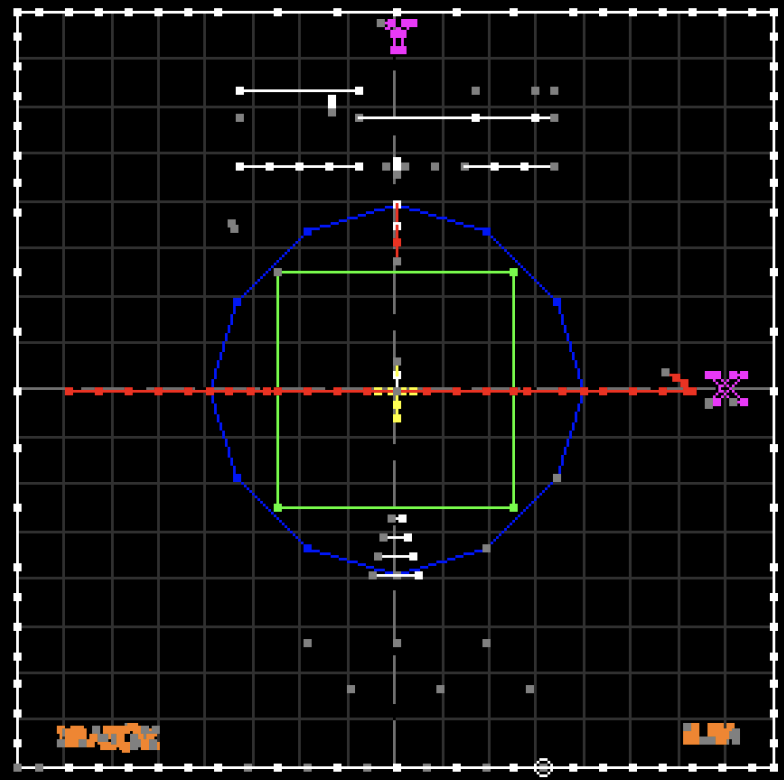
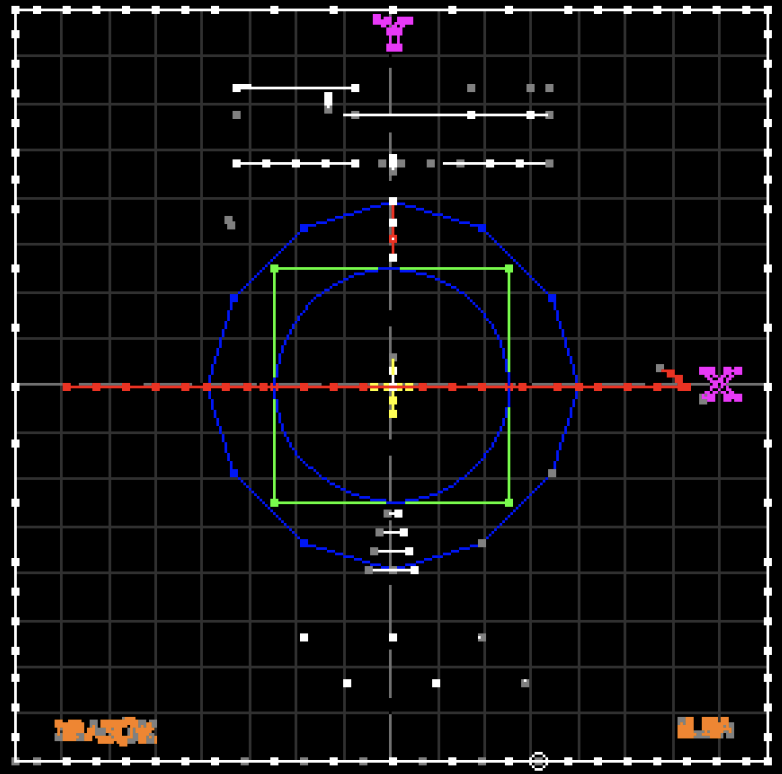
At the left side, the ILDA test pattern as it is. At right side – ES Mode, Original and Simulated Points Placement.
 |  |
 |