
Tools
Support
Pangolin Family of websites
Pangolin Laser Systems, Inc.
Kvant Lasers
Unity Lasers
ScannerMAX
Lasorb
Tools
Support
Pangolin Family of websites
Pangolin Laser Systems, Inc.
Kvant Lasers
Unity Lasers
ScannerMAX
Lasorb
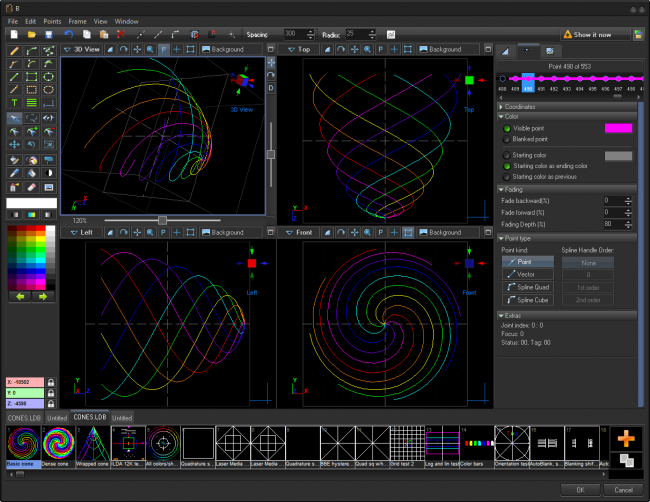
The Advanced Frame Editor is the 3rd generation of Frame editor to be included in BEYOND. The first generation is the simple editor currently available in the “Create” menu. The second version was too complicated, was included in BEYOND for only a short period of time, and has been removed. The 3rd generation Editor is based on the 2nd generation editor, but is better balanced logically. Laser frames have many things in common WAV audio files. The frame is actually a wave form sent to the X, Y and Color output DACs. The point of a laser frame is like a sample of an audio file. For wave files there are well known editors like SoundForge, Audition and so on. Our Frame Editor is conceptually a wave form editor. No parametric objects (like a MIDI Synths in audio apps) are needed or a local coordinate systems. Conceptually this is similar to what we did before LD2000.
In addition to the classic tools, we have also introduced several new ideas. The first change is the Point. In LD2000 we have point oriented and vector oriented frames. In BEYOND we have “mixed” frames where vector and point data are present together within one frame. You will not see any more “vector oriented” or “point oriented” frames. You can easily use them both together. Technically, this is same object, but a vector has a special attribute “I am vector”. BEYOND turns on special processing for such points.
The next addition is a curve. There are two types of curves in BEYOND - 2nd degree and 3rd degree Bezier curves. The second degree curve is used in TTF fonts. The 3rd degree curve is widely used in graphic editors. The Frame editor has two sets of drawing tools oriented on points and vector/curves.
We added a new color option. For vector/curves you can define the start color of a line and the end color of a line.
We added fading for the vector/curve beginning and ending. There is a parameter for the depth of start fade and for the depth of end fade.
And finally, the frames that use curves and new color options are double-layered. For compatibility with all existing Pangolin systems, a new frame keeps two things - frame definition and rendered frame. The definition has curves and all related options. The rendered frame has only points and vectors, no curves or complex options. This is an automatic process, you do not need to be concerned about its execution. If you do not use curves then the editor use a classic, single layer frame type.
Frame Editor New has a manual picture tracer. It works in a similar was as the LD2000 system, and allows the use of mixed semi automatic and fully manual outlines.
Frame Editor New provides the ability to open a few frame files to simplify moving the frames between the files.
| Tool | Description |
|---|---|
 | Create a new animation (frame sequence) / Open an animation from file / Save an animation to file |
 | Undo |
 | Copy selected points / Paste selected points / Delete selected points |
 | Show points / Show blanked lines |
 | Show curve handles |
 | Snap to points of the frame |
 | Snap to coordinate system |
 | Show laser cursor |
 | Point spacing/density for point oriented tools |
 | Radius of action. This is a parameter enabled when corresponding tool active |
 | Frame Analyzer |
 | |
 | Set projection zones for output |
| Tool | Description |
|---|---|
 | Sets the view port projection focus; such as Front, Left, Top and other |
 | Sets alignment values for view port angles. When you rotate the view port, the angle will be aligned by the specified value |
 | Rotates the view port |
 | Moves the view port |
 | Zooms the view port |
 | Enables perspective view in the view port |
 | Shows the cross-cursor |
 | Animates the selected points |
 | Opens Background picture menu |
 | Maximize/restores view port |
| Tool | Description |
|---|---|
 | Sets the mode for the view port sliders - position, rotation or depth |
| Tool | Description |
|---|---|
 | Freehand tool. Hold the CTRL key to set a Beam point |
 | Curve tool. Draws a single 3rd degree curve. Hold the CTRL key to align the line to view port align value |
 | Spline oriented freehand. At the end of draw, the editor will transform the freehand path into a sequence of curves |
 | Polygon. Each mouse click adds a new point to the polygon. If the mouse button is held down, this tool will work as Freehand. Right click - stop polygon |
 | Curve oriented polygon. Operates with 2nd degree curves. Great for logo tracing. Hold the CTRL key to add a point instead of curve base; this allows you to add a sharp corner |
 | Curve oriented polygon. Operates with 3rd degree curves. Click to add a new base point to a polygon. Important: after your mouse click that adds the base point, do not release the mouse button, instead - move it, and it will control the spline handles |
 | Vector oriented line. Hold the CTRL key to align to the angle you desire |
 | Vector oriented rectangle. Hold the CTRL key to make a center based frame, hold SHIFT to make a square |
 | Curve based ellipse. Hold the CTRL key to make a center based frame, hold SHIFT to make a circle |
 | Point oriented line. Hold the CTRL key to align to the angle you desire |
 | Point oriented rectangle. Hold the CTRL key to make a center based frame, hold SHIFT to make a square |
 | Point based ellipse. Hold the CTRL key to make a center based frame, hold SHIFT to make a circle |
 | Text tool |
 | Parametric tools. Allows drawing by means of standard, predefined objects |
 | Moves the Guide lines. For deleting - move the line outside of the view port |
 | Select tool. Click on a visible point - select a segment. Hold the CTRL key to add to the selection. Click on empty space for rectangular selection |
 | Lasso selection. Draw a free form area and the points inside the area will be selected |
 | “Gravity” tool. Editor shows a circle. Points inside the circle will be slowly pushed out from the circle. Hold the CTRL key to do the opposite action |
 | Point tool - designed to move single points or lines |
 | Split line or curve. Click inside any line or curve and the editor will add a point. You can also move the point in this mode |
 | Delete a point |
 | Moves selected points |
 | Rotates selected points |
 | Resizes selected points |
 | Recolor multi-tool. Click on a line to recolor it with the selected color. Click on empty space, lasso tool, and then recolor. Click on line(point) with CTRL to recolor a segment |
 | Lasso based recolor tool |
 | Rectangle based recolor tool |
 | Pick a color, click on line or point and edit to use this color (eye dropper tool) |
 | Fill tool |
 | Blank / visible. Based on Gravity tool. All points within the circle-cursor will become visible. With CTLR held the points will be Blanked |
 | Spray tool. A soft recolor, based on Gravity tool. Points within the circle-cursor will slowly be recolored to currently selected color |
 | Eraser, still in test mode |
 | Tracer tool. See chapter about tracer |
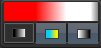
Color panel shows the current selected color and mode. Left button enables a start fade, the middle button enables gradient mode, and the button on the right enables a finish gradient. The gradient and fading work for vectors and curves. Click on the panel to open the Color dialog box.

Coordinates show the current cursor position in the view port. Lock allows you to disable the change of X, Y, or Z coordinates while using tools such as move, resize, and rotate.
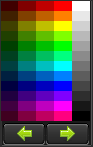
The Frame Editor has a few color palettes that you can choose from by means of Left/Right buttons. Click on the panel change current color that is being used for drawing tools.

The guide lines can be used to markup the drawing area. The mouse cursor will snap to the guide lines. For adding guide lines, click and drag the short blue line to the center of view port. For changing the guide line position use corresponding draw mode tools.
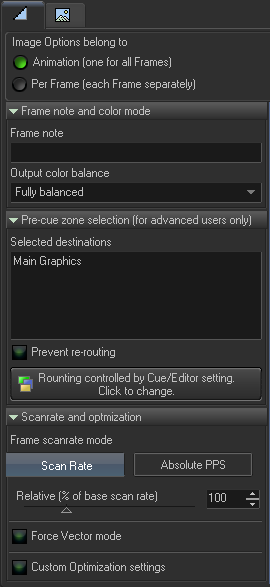
The Animation properties tab is an extended version of the Image Properties dialog. The Animation properties have a specific option that defines (who has) Image properties.
Image properties also include a zone selection. For LD2000 users, it known as the “preferred zone”. If the animation is used inside a Cue, then the cue has its own zone settings. The Cue settings have a higher priority than Animation settings, and if a Cue’s zone settings are defined (not empty), then the Animation level setting will be ignored. If you need to use an animation setting then leave the Cue settings empty. Please read the chapter about Routing. Other settings inside Animation tab.
The Animation properties tab is a copy of the Image Properties dialog. Please read the chapter about Image Properties.
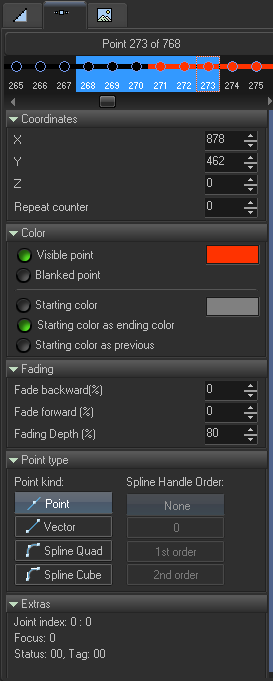
At the top of the Point properties tab there is a point list. Here you can select one or more points and make changes to them. All changes made in this tab are applied to all the selected points. The point list shows the color of the point. Current points have a selection rectangle, all selected points have a blue background.

Frame list shows the Frames of the animation. Frame related operations will be applied to all selected frames. For adding new frames, click on Plus icon at right of the list. For duplication of the currently selected frame, click on the “Copy” icon. To delete the frame, click on the Delete button on keyboard. The Frame List has a context menu with all frequently used commands.
All commands related to the Frame List are located in main menu Frame.