
Tools
Support
Pangolin Family of websites
Pangolin Laser Systems, Inc.
Kvant Lasers
Unity Lasers
ScannerMAX
Lasorb
Tools
Support
Pangolin Family of websites
Pangolin Laser Systems, Inc.
Kvant Lasers
Unity Lasers
ScannerMAX
Lasorb
he BEYOND TimeLine is a list of Tracks. A Track can be one of three types. The first type is the “Image” track. Image tracks contain Images like Frames, Shapes, Scrolling text, etc. The Image Track can also contain DMX and Beam Sequences. The second track type is the Audio/Video (A/V) track. The A/V Track is used for Audio, Video, and Picture files. The third track type is the Bus Track, and is designed for effects that are applied to a group of tracks. This is useful if you need to fade out all tracks. Instead of making an effect inside of each track, you can make it once in a Bus Track.
A note on terms used in this document: Content, Cue, and Event. “Content” means an Image: Frames, Abstracts, or DMX/Beam sequences. A “Cue” is a container for Content. A Cue has a many uses, but only one main purpose - it is a container. Lastly an “Event”. An Event can use a Cue from a Workspace, a Cue from the Cue List, or keep the Cue inside (local Cue inside Event). Logically, an Event is a part of a TimeLine; one of its native design features is to define a period of time for “something” to happen. That “something” is a Cue. But a Cue is a container. As a rule, a Cue and Content look like solid things, and you do not need to separate them. For Events and Cues it is important understand the implication of a local Cue and a Cue inside a Cue List or from a Workspace. It is important to define the distinction between a Workspace or Cue List Cue and a Local TimeLine cue; a Workspace/Cue List Cue is a pointer or reference to a Cue somewhere else (note a “shortcut” like icon on the TimeLine Event) and will be altered if the Workspace/Cue List cue is altered. A local TimeLine Cue is just as it is called, local to the TimeLine and can only be altered on the TimeLine.
A Track can contain one or more lines. The main line’s purpose is to correspond track types (images, A/V, Bus). The additional lines are for effects. BEYOND executes the effect lines from top to bottom, one after the other. The effect inside the track works for this track only.
Each line can contain one or more Event. An Event is a container for Cues and Effects. Each Event has a start and ending time. Pay attention that there can be zero length events; these appear mostly within imported ST2000 shows.
Before using a Cue/Image on a TimeLine, you should decide on a couple of things: “will this content be used once or multiple times within this TimeLine show?”; If multiple times, will it be multiple copies or one “thing” that will be used in multiple individual Events. Sometimes you need multiple separate copies, in this case you can edit the content and the other copies stay unaltered. In other situations, it is better to use one instance. For example, using a company logo multiple times in a show; the customer may want to adjust the logo design multiple times while the show is being programmed. If you are working with one Cue that contains the logo then this it is simple to edit that one referenced Cue; if you have multiple local copies, it can take some time to edit each local Cue separately.
What is the better choice: local Cue or Cue in list/Workspace? There is no correct answer for this question. Sometimes you need a local Cue, sometimes a referenced Workspace/List Cue. Recommended rule - if the Cue is used once, then it makes sense to make it local. Otherwise it can be more optimal (memory use) to use a referenced Cue.
The same logic works for Effects too. A TimeLine has a Cue List and an Effect List; both are containers for Cues/Effects, and allow you to operate with local “things” and things from the list.
BEYOND uses the same logic for projection zone routing in all places. The tracks, and top most objects have a priority for setting the routing of content. Tracks have a Track Properties dialog, where you can set the routing. By default, the Track Properties routing is in a neutral state. The next place is the Event. An Event also allows the setting of zone routing. After that comes routing from Cue properties, and later Content properties (Images like Animations, Shapes, Abstracts and so on).
Also, you can use Effect based routing, by means of Zone chase and Zone effects. This style of operations is a new way for LD2000 users.
For getting more information about projection zone routing please read the corresponding Projection Zone routing chapter.
BEYOND allows the use of classic, ST2000 style show design. The Cue List replaces the Frame List. The Effect List is fairly similar to the Effect list of ShowTime. The TimeLine structure is similar once you add a few optional Effect lines; a Frame is added to the TimeLine as an Event and you then add Effects onto the added optional Effect lines. In addition to this familiar ST feel, you can also use local cues, BEYOND effects, and all the other ease of use advantages of BEYOND; for example, the Effect editor implementation as a tab at right of the BEYOND interface (under the preview window) allows the effect editing process to occur inside one window plus immediate access to various frame editors directly from the TimeLine (right click on event for menu option).
BEYOND uses a “special double-click” method; a left mouse button click sequence of down, up, down, move mouse to right, up will create Event by the “double click”, and also during the second click allow you to set the event duration within this one operation.
If you dislike double clicks, that is not a problem; at the bottom of TimeLine interface there is “Draw event” tool button. In this mode you can draw events in a similar way as in MS Paint.
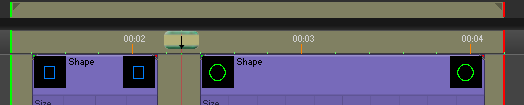
You can change an Event size by moving the mouse to the left or right boundary of the event, click and holding the Left mouse button, and dragging the boundary to your desired length. Click and hold inside the Event rectangle and drag to move the Event along the TimeLine track. Special actions are available when changing the event size with the CTRL key held. When CTRL is pressed and you change the start/end position of an Event, BEYOND creates a “time marker” indicated with vertical lines; this will move all Event boundaries that touch this marker. Time makers have special roles in quick editing.
Hold CTRL and then move an event. After moving the cursor 10 pixels to the left or to the right, BEYOND will create a copy of the Event.
 | Inside a selected (highlighted) Event, there are gray arrow icons. Clicking on these Icons will resize event by snapping the Event boundary to the neighboring Event. |
 | When the ending time of an Event is equal to the start time of the next Event, a white rectangle will appear at the bottom of the two Events, like a sticker connecting the two. |
At the left top corner of an Event there is Green triangle. At the right side there is similar red triangle. Move them inside the Event and the covered area will work as fade in / fade out effect for Image events.

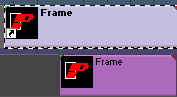
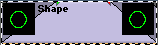
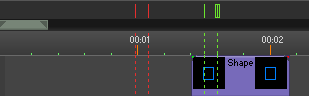
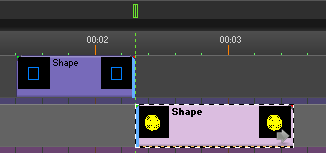
If one Event partially covers a neighboring event, a transition occurs between the Events where they are overlapping. The type of transition can be selected in Event tab to the right. This only works for Image type events.

In the picture above, we have an example of an Event with two fully overlapping Events on it. Where one event (blue rectangle) covers the other (green circle) BEYOND will display the events as they are painted. At first the Green circle, then the Blue rectangle, then back to Green circle. This is not a recommended style of show design, but such a combination may appear during editing.
The right mouse button is dual action; right clicking with the Mouse will call up a context menu and moving the mouse while holding the right button will scroll the cursor position along the TimeLine.
The mouse wheel controls a few actions, depending on accompanying keyboard modifiers:
Without any keyboard keys - zooms TimeLine in/out on current cursor position.
With CTRL - horizontal scroll.
With SHIFT - vertical scroll.
TimeLine ends at end of the most right Event. If you need to increase the TimeLine duration, move one of events to the right, or click on gray arrow button at right side of TimeLine interface.
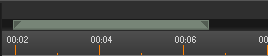
In addition to hotkeys and zoom buttons, at top to time ruler, there is a green gauge that represents the visible area of the TimeLine. It works similar to an Event as you can move the beginning/ending as well as the “body” of of the view area.
User time is designed to set the start/end time of the playback of a portion or all of a TimeLine show. When the User time is set, BEYOND will play the selected portion of the show in a loop.
User time can be set by using the hotkeys Ctrl B and Ctrl E, like in ST2000, or by buttons on main toolbar. The top most panel allows you to set and move the User Time with your mouse.
Time markers are very important if you want to work quickly within a TimeLine show. They have multiple actions that are used to create a visual indication of important places on the TimeLine. Lines work as a “snap-to” lines. When you edit an Event’s start or end position, the event will snap to the marker.
Markers can move Events. If an event starts or stops on a marker, moving the marker will move the snapped Events.
If a Marker is snapped to an Event, then the Event will have a blue-line indicator.
BEYOND’s TimeLine allows the use of up to 500 markers. Each Marker has a color and the color must be set before adding a marker to the TimeLine.
 | The Button at right side of a TimeLine, sets the current marker color. Pressing ENTER on the keyboard adds a marker in current cursor position. |
 | BEYOND has a special mode for adding markers: |
In this mode, keyboard keys will create a marker at the current cursor time position. We recommend using this method in playback mode.
If you create a show with an audio file, set the audio track, start to playback the media and create time markers in places where you think you will make Events. After the markup, the markers will help as snap lines, and once they snapped to the events, it will help with fine tuning of event position - move the marker and it will move related events.

The Track caption area has multiple important controls. Doubt click on the Track name to call the Track Properties dialog. Right click to call a context menu of the track.
| Triangle icon - Controls the height of the Track. It show/hides effects inside the Image Events. A Triangle icon also exists in the Image and Effect lines. | |
| Plus/Minus - show/hides additional effect lines of the Track. | |
| Mute - Mutes the Track or the Line. | |
| Solo the track - Solo has higher priority that mute. | |
 | Line height control - Smaller bars represent a smaller height of the effect line. |
 | Big gray Plus icon - calls a menu for adding Laser, A/V tracks, or an Effect line. |

Starting in BEYOND 5.5 you can now search and filter your tracks by Track name. This is located at the bottom of the track list in the timeline window area.


A/V Events can contain audio, video or picture files. The audio and video files work as a time code source. Double click on A/V track to call “Open File” dialog and create A/V Event.
Many A/V related operations are located in the context menu of the Event (to the right under the preview window).
There are a few details that you should know:
Each Audio/Video Event has its own A/V player. Each player uses PC resources. We recommend not creating many A/V Events. The least number possible is best in all aspects.
Compressed formats frequently give less accurate timing information, and can create lags. Less compressed formats provide better results. If you encounter some time sync problem, try converting the audio/video file to a less compressed format.
As a time code source BEYOND uses the first suitable A/V Event starting from the Left/Top of the TimeLine. This means from the 1st A/V track, and from beginning to end of that Event. If you use multiple A/V tracks, then Event positioning influences the time code. Place your longest A/V on the 1st track and all smaller A/V Events below.
If there is empty space between A/V Events then an internal clock will be used. This means BEYOND will play the TimeLine according to the 1st event, after that no sync, and after that, internal time will be synchronized to the second/next A/V event.
BEYOND uses one, and only one time code source at a time. You can use external time code, or A/V events. Do not expect that BEYOND will synchronize A/V playback to incoming time code. If you need such combination, then use A/V track as sync source, and configure TimeLine generated time code.

Audio/Video Events, just as Image events, have Fade In/Fade Out handles at the top of the Event rectangle. The fade is implemented by means of volume and alpha channel (transparency) control. The video window background is black and transparency based control looks like a brightness control.
When one A/V Event partially overlaps another Event, it causes a transition between the Events. Just as the fade control, the transition is based on volume and transparency.
Volume, Pan and Alpha Envelope
The context menu of A/V Events have the following commands:
Volume envelope - controls audio volume level.
Pan envelope - controls panorama of video.
Alpha envelope - controls transparency of video.

Each command adds (or deletes) a corresponding envelope to the Event. The envelope looks like a line inside the Event. Double clicking on the line will create a node that defines the time and value of a change. Right click on the node to delete it.
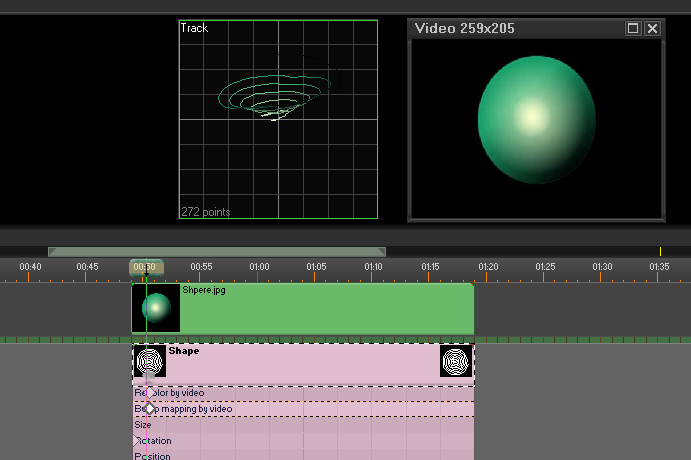
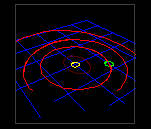
BEYOND has a “Recolor by video” key effect. BEYOND uses a captured video frame and uses it as a bitmap for recoloring the laser frame.
A similar key effect is “Bump mapping by video”. This idea for this effect came from LD2000. The Effect changes the Z coordinate of a laser frame according to the brightness of a corresponding part of a video bitmap.
In this example the simple spiral frame recolored and bumped by the picture:
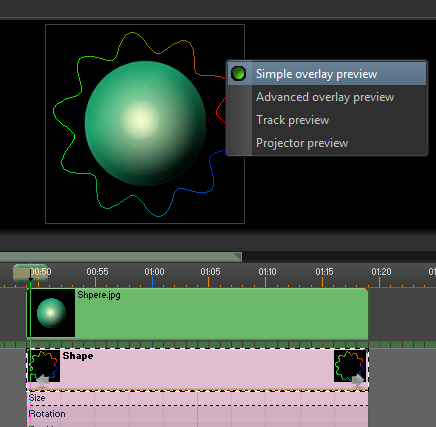
TimeLine has its own preview panel with a few preview modes available. One preview modes is “Simple overlay” that uses a captured video frame as a background for laser view. Such a mode could be useful for laser over video show design.
A note about captured video frames and the BEYOND Universe. The Universe has a component for previewing; it does not provide high quality output, plus it can be CPU costly (as any capture process is), but it might be handy to mock up a more complex preview than BEYOND offers in the standard preview panel.

Create - offers a variety of editors for the creation of new laser content.
Open Image - opens an Image (frames, abstracts, etc) from a previously Saved file.
Edit - edit menu appears where applicable for corresponding content types.
Convert to local Cue - copies the Cue from the Workspace or Cue list into the TimeLine Event. After that, there is no relation with the previous source of the Cue.
Move to Cue List - moves a local Cue as a new item in Cue list. After that, the Event will use the Cue in the Cue List as its source which makes all changes to the Cue list Cue occur in the TimeLine Event.
Cue Properties - calls the “Cue Properties” dialog for Cue of the currently selected Event.
Edit Cue Effect - an Event has its own effects and a Cue has its own effect. This can be Two different things. When a Cue is inside the Event then the Effect tab links to the TimeLine Event, but what if you need to edit effect of cue? This command links the Effect tab to the Effect of the Cue.
Copy content - copies the content of the Cue to the clipboard.
Paste content - pastes content from the clipboard into a Cue .
Mute Event - makes the Event inactive (like no event in this place at all).
Lock Event position - blocks the ability to move an Event.
Copy Event, Cut Event, Paste Event - standard clipboard operations with selected Events.
Open Media file - opens an A/V file, this is for A/V events.
Media File information - status information about the media file.
Show in Explorer - shows the media file used in A/V Event in Windows Explorer.
Volume envelope - show/hides the volume control envelope.
Pan envelope - show/hides the pan control envelope.
Alpha channel envelope - show/hides the alpha channel control envelope.
Add Effect Item - adds an effect item to the effect line of a currently selected Event. This is a pointer to an operation in the Effect tab.
Copy effect - copies the effect of an Event.
Paste Effect - pastes an effect into an Event.
Delete Keys - deletes the selected keys on key effect lines.
Move Effect to Effect List - moves a local effect into the Effect list.
Convert to Local Effect - copies an effect from the Effect List (of FX). After that, the Event uses its own copy of the effect, instead of from the effects list.
Dynamic Expand - makes the currently selected effect item line taller in appearance than other lines.
TimeLine adds one more rule on how to use an oscillating effect that is dependent on the Event duration.
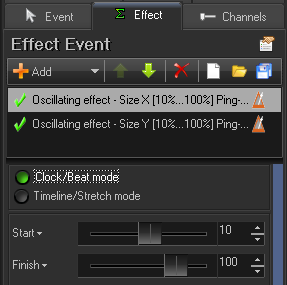
Clock/Beat mode - means that the effect runs the same as inside the Grid or live mode. It depends only on the current time.
TimeLine/Stretch mode - in this mode, effect execution depends on the Event duration and the number of loops during the effect. The playback speed will depend on these two parameters. Both options are Available in the context menu of the Effect Event line.
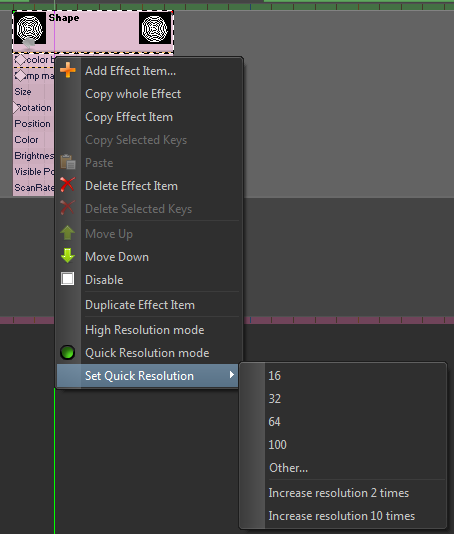
Key effects have a couple of options for when used inside a TimeLine show that mainly deal with time Resolution.
Internally, the key effect is designed in such a way that it can work with ultra small time resolutions; this is the same as with a TimeLine increment that is less than 1ms. With small resolutions, like 16 and 32, it is it easy to put the key into right position, the resolution works as a “snap to” function. But it does not allow the ability to place the key in any place you want. BEYOND also offers a high resolution mode that works well, but can be time consuming while editing. BEYOND offers 3 variations: beat like (16, 32…), percent (100 divisions) and High resolution.
High Resolution mode - the resolution is just as it is in the main TimeLine, and the key line is not in stretch mode. Changes of Event durations will not change the key position relative to the Event start.
Quick resolution mode - in this mode, you specify a number of divisions in the Event duration. By default BEYOND and QS use 100. Predefined options are 16, 32, 64 (beat like) and 100 (percent). The menu “Other…” allows you to set any resolution you like.
Depending on line height, the key effect view has a few painting modes. The simplified mode looks like this:

In the full view mode, the TimeLine paints the diagram of the key effect line. The diagram shows the change of values. Not only the form changes, but the values too.

The small nodes can be moved up and down which will change the value. The rate of change (acceleration) is controlled by the context menu of the key. The context menu is available by right clicking on the key-icon in the TimeLine as well as in the Effect tab.

Double clicking on the key will call up an editor window. This Pop up window is a copy of the key properties panel in the effect tab; it appears near the key to be changed to decrease mouse motion distance.
This Toolbar has a few buttons for quick navigation by the keys; the central area has sliders for key state editing, and the button area has a Preset list where you can place your frequently used values.
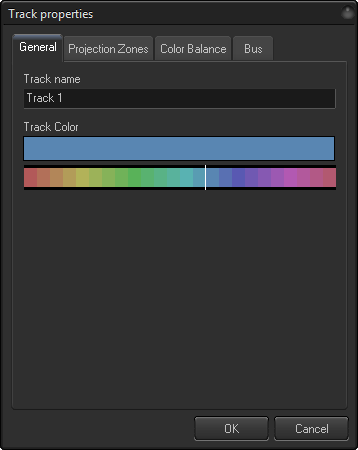
The Track properties have a few simple settings for the track.
Track name - the name that appears in the track caption.
Track color - color of the track events and boundary areas of the track.
“Output all Events of the Track to” list a Projection Zone settings of the track. The Track is higher level object than an Event or a Cue, because its setting has a higher priority.
Please check the chapter about Routing for more information. If you see some unexpected behavior then: Some Event, or Cue, or Image uses the “Prevent rerouting” option.
There is some effects to modify routing information by means of Zone Chase, Zone Routing or settings inside the Effect properties.
Output color balance for this track allows BEYOND to ignore settings of the Event and Images and uses the Track settings instead.
The TimeLine preview panel has a few preview modes designed for different purposes. Below are a few screenshots that demonstrate the differences:
Simple overlay preview is a standard mode for many editors in BEYOND. Without any extra settings the output framed is displayed on the panel. Advanced overlay uses Projection Zone settings, this is the classic method of LD2000. Note, you can also use the ERP window.
Track preview displays all tracks:

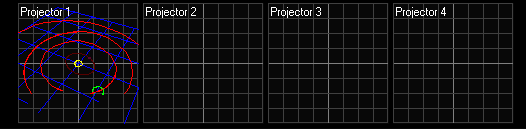
Projector preview displays output by projectors:
The simple overview has an additional trick. If the show uses video files, then BEYOND displays the video frame as a background for the laser frame preview. It helps with “laser over video” shows.
Menu “File” has a couple of commands related to show security. Both are standard for BEYOND files:
File password - this is a passwords for opening the file.
Security Wizard - standard security wizard that can be used for the Show object. Please read the chapter about the Security Wizard.