Tools
Support
Pangolin Family of websites
Pangolin Laser Systems, Inc.
Kvant Lasers
Unity Lasers
ScannerMAX
Lasorb
Tools
Support
Pangolin Family of websites
Pangolin Laser Systems, Inc.
Kvant Lasers
Unity Lasers
ScannerMAX
Lasorb
The default1) settings for AutoSpace Distance (shown below) place a higher point density in areas of the image that have curved lines, and a lower point density in areas of an image that have straight lines. This provides the best utilization of the scanner’s bandwidth. It also results in laser frames with the least number of points.
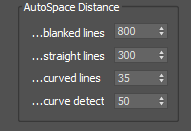
However, as the point density changes, so does the apparent brightness in that area. If you would like to have even brightness over the entire image (constant point density), there are two ways to accomplish this.
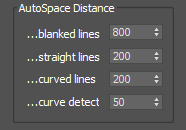
One way is to make the Curved lines point density exactly the same as the Straight lines point density:
The other way is to simply set Curve detect to a value of 0:
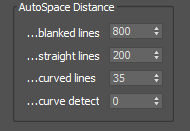
Note that in both cases, the Straight lines point density needs to be decreased from the default value of 300. This ensures there will be enough points placed for small details and to avoid rounding in the images.
The default1) setting for AutoAnchor Points (shown below) has Accelerate/Decelerate enabled. This helps the scanner ease in and out of lines. It also reduces the number of points that you need to use at the beginning and ending of lines.

However, it could also slightly increase the brightness at the beginning and ending of a line as well. In some situations, you don’t want to call attention to the beginning and ending of a line. For example, in the picture below, as the landscape goes behind the dinosaur and outside the window, it would be best if there were no additional brightness.
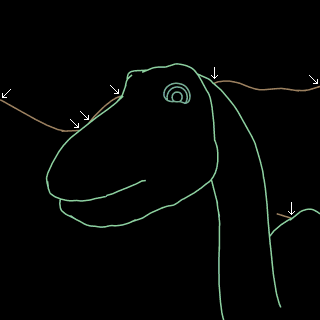
To reduce the brightness at the beginning and ending of lines, you can disable the Accelerate/Decelerate feature:

In addition, you could also reduce the number of points at the beginning and ending of a line.
