
Tools
Support
Pangolin Family of websites
Pangolin Laser Systems, Inc.
Kvant Lasers
Unity Lasers
ScannerMAX
Lasorb
Tools
Support
Pangolin Family of websites
Pangolin Laser Systems, Inc.
Kvant Lasers
Unity Lasers
ScannerMAX
Lasorb
Using 3ds Max's import feature, Lasershow Converter MAX can convert several different kinds of files directly to laser frames. These file types include Adobe Illustrator AI and AutoCAD DXF and DWG file types.
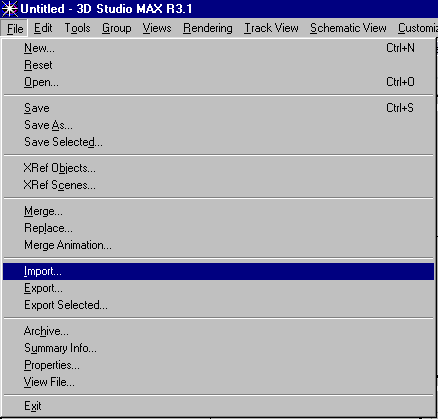
1. Select the File/Import menu in MAX.
2. Use the file filter to select the type of file that you want to import. In the picture below, AI format is selected.
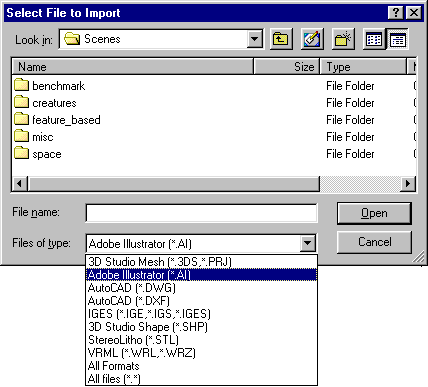
3. Select the file from the file dialog, and press OK.
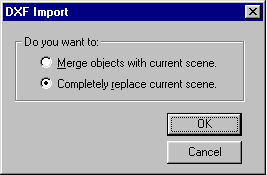
4. A message box asks whether you want to merge this file with the existing scene, or completely replace it. Usually you should choose “Completely replace current scene”.
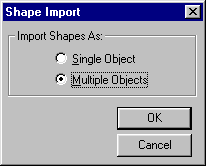
5A. (for Adobe Illustrator AI )
A message box asks if you want to import this as a single object or multiple objects. Either option will work. However, the “multiple objects” method is preferred. It gives you more control – you will be able to assign colors, and laser point placement settings differently for each object if desired.
5B. (for AutoCAD DXF).
An Import DXF File dialog box comes up. Most of the time, the default settings should be used. For more information about these options, see the 3ds Max help file.

6. The file will now be imported into the top view. However, it may be out of sight. Therefore it is best to press the Zoom Extents All button on the lower right hand corner of 3ds Max.

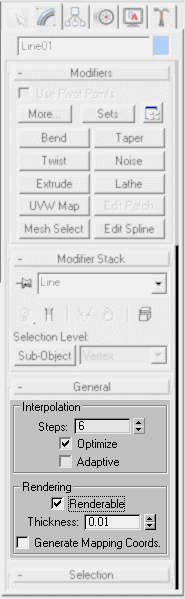
7. The object or objects are automatically selected. From the Modify tab, select the Renderable checkbox, and set the Thickness as close to zero as possible by manually entering 0.001. If more than one object was imported, you must select each object separately and do this.
8. Select all objects by using the Edit/Select All menu.
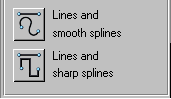
9. Go to the Lasershow Converter MAX utility plug-in, Object Quick-Setup panel. Click on one of the two spline buttons, to assign preset default settings to the selected objects.
10. Render a single frame with Lasershow Converter MAX. Later you can render an entire animation sequence. For now, it is best to view the laser output, and adjust the Lasershow Converter MAX settings as needed, to get the best results.